The Litters section in the backend is home to all litter entries. This is a Custom Post Type created specifically for your dog breeding website. Each entry contains all the information related to a litter, including litter status (current, future, or past), litter details, the parents, puppy profiles, litter updates, and a photo gallery.
Adding New Litters
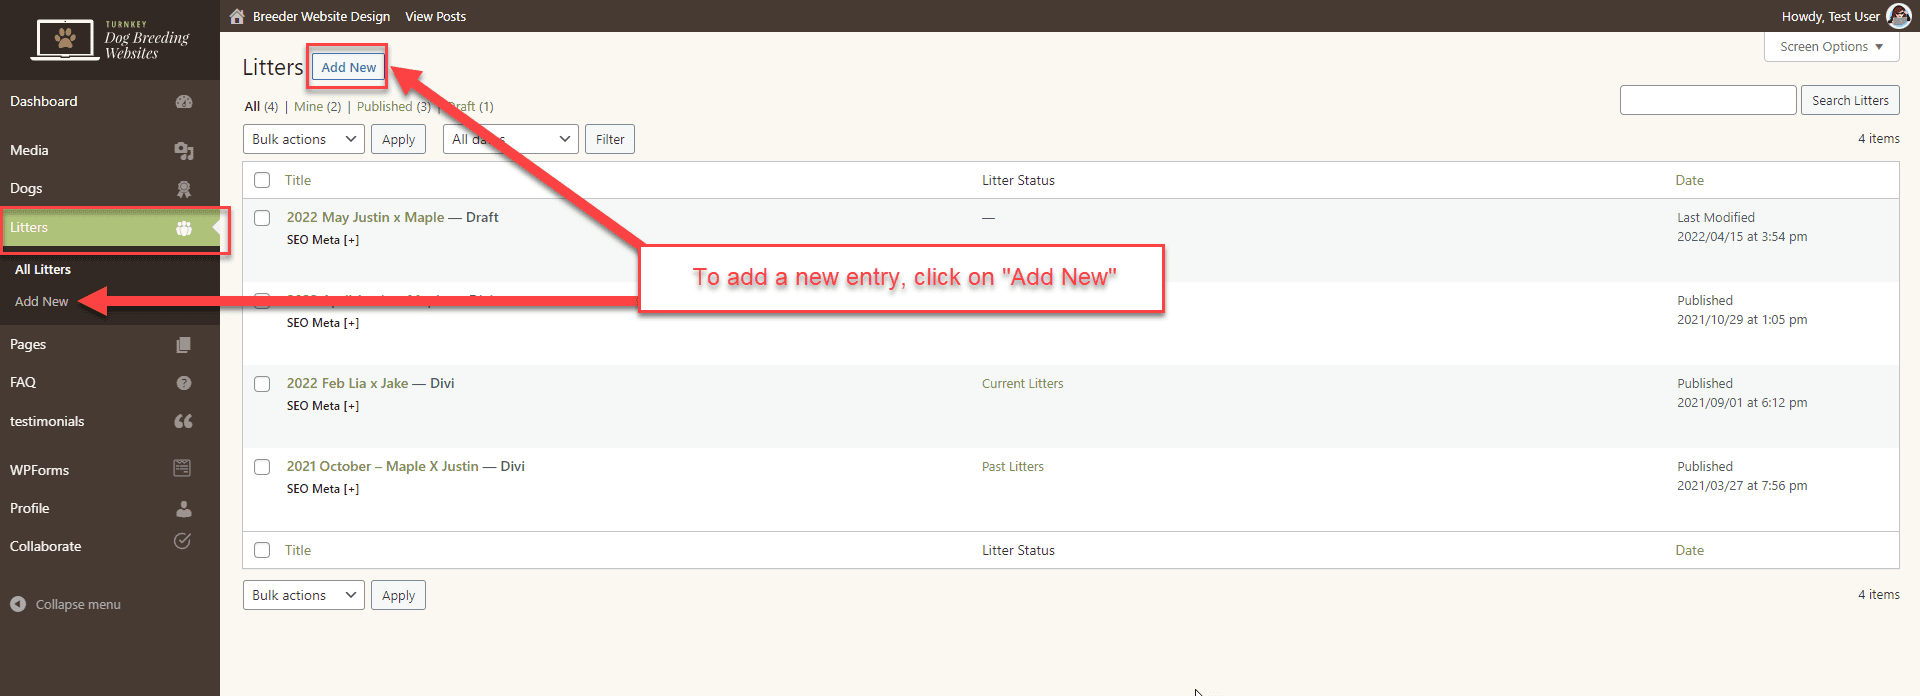
To add a new Litter entry, click on one of two “Add New” options.
Title
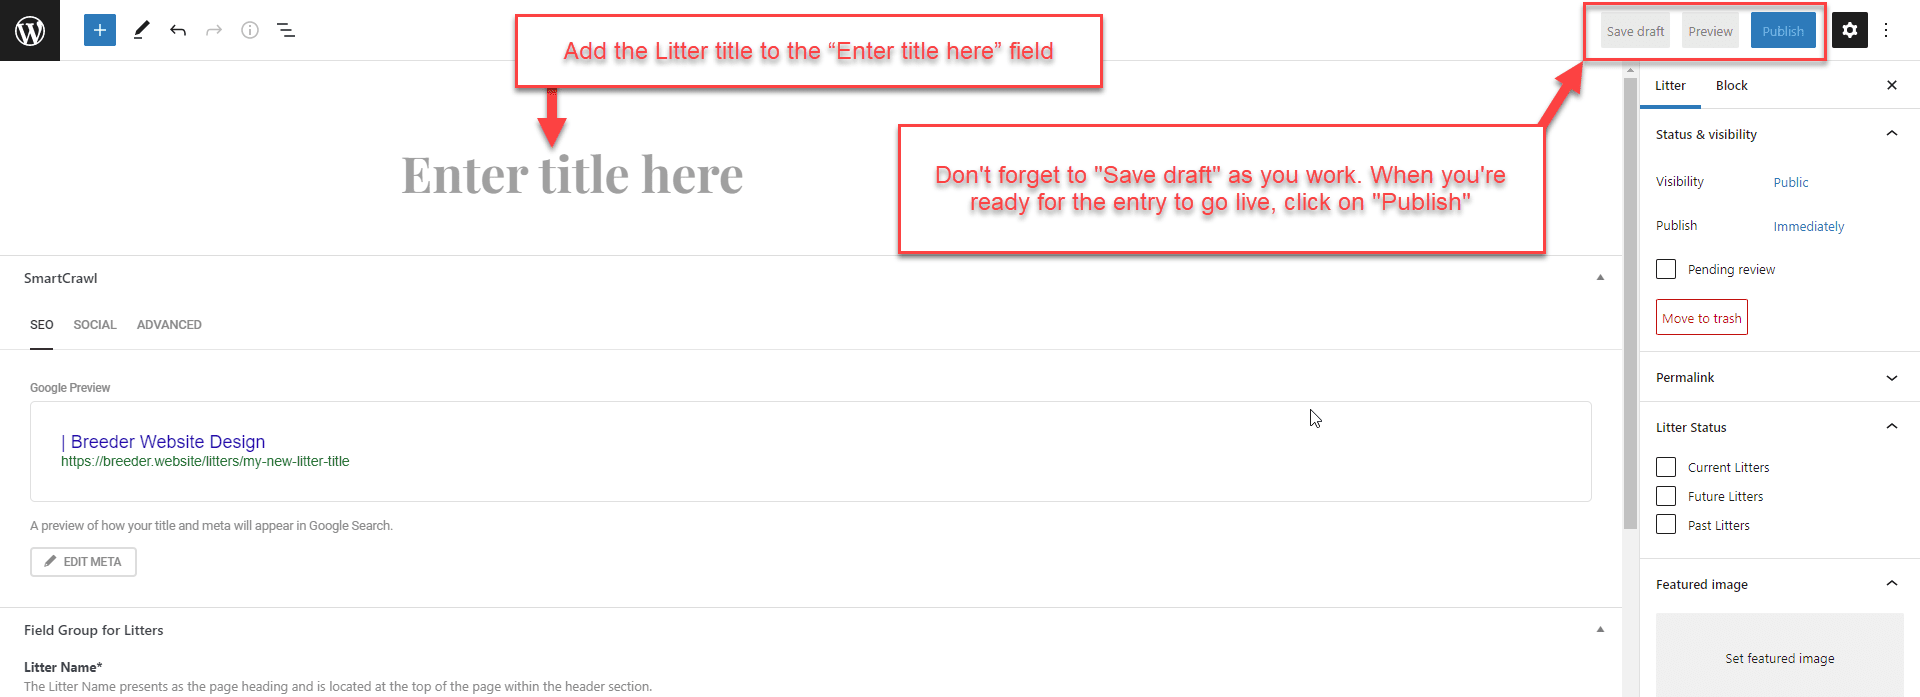
When the “Add New Litter” page opens up, add the Litter title to the “Enter title here” field.
Litter Title Best Practices – Ideally, you want a unique title for each litter. Since you’ll likely breed the same dogs, you should create a nomenclature that works for you. My suggestion is to incorporate the year and month. For example, 2022 April Justin x Maple.
Avoid Long Titles – Using the parent’s nicknames will prevent titles from becoming too long.
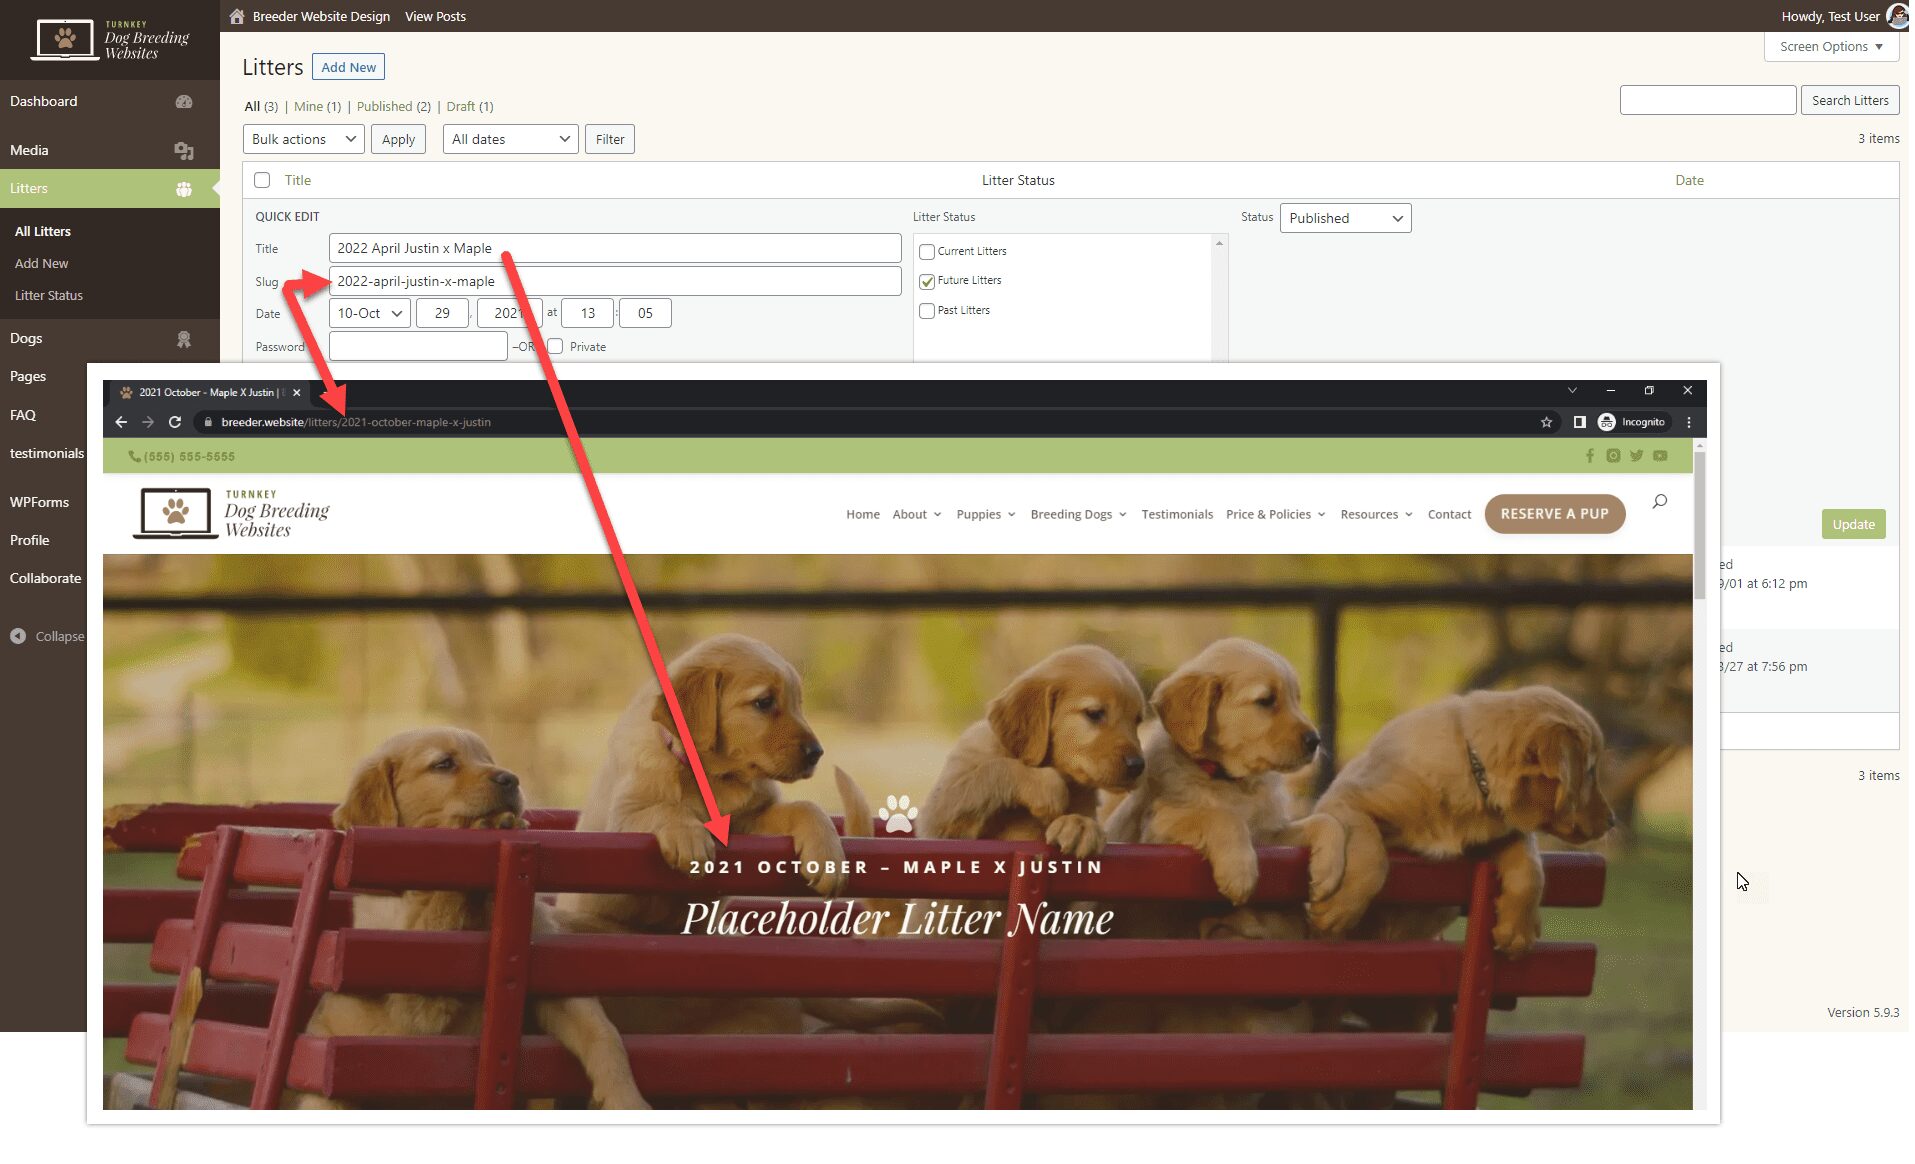
On the front of the website, the title presents on the featured image at the top of the page.
The title you create will be reflected in the page “slug,” which is part of the URL.
SmartCrawl
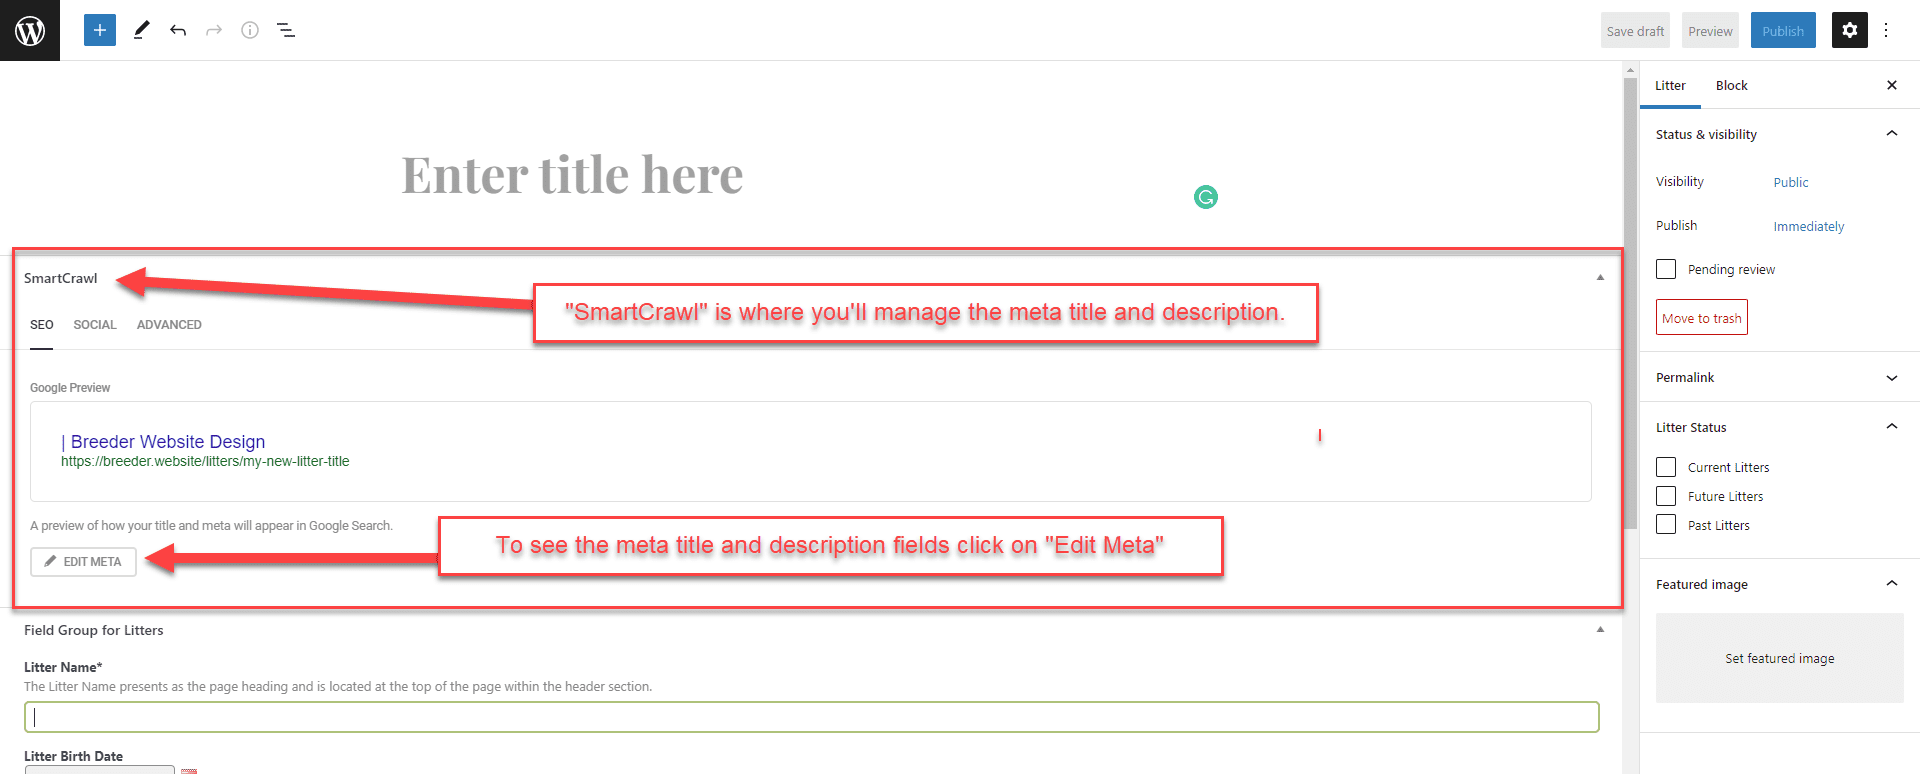
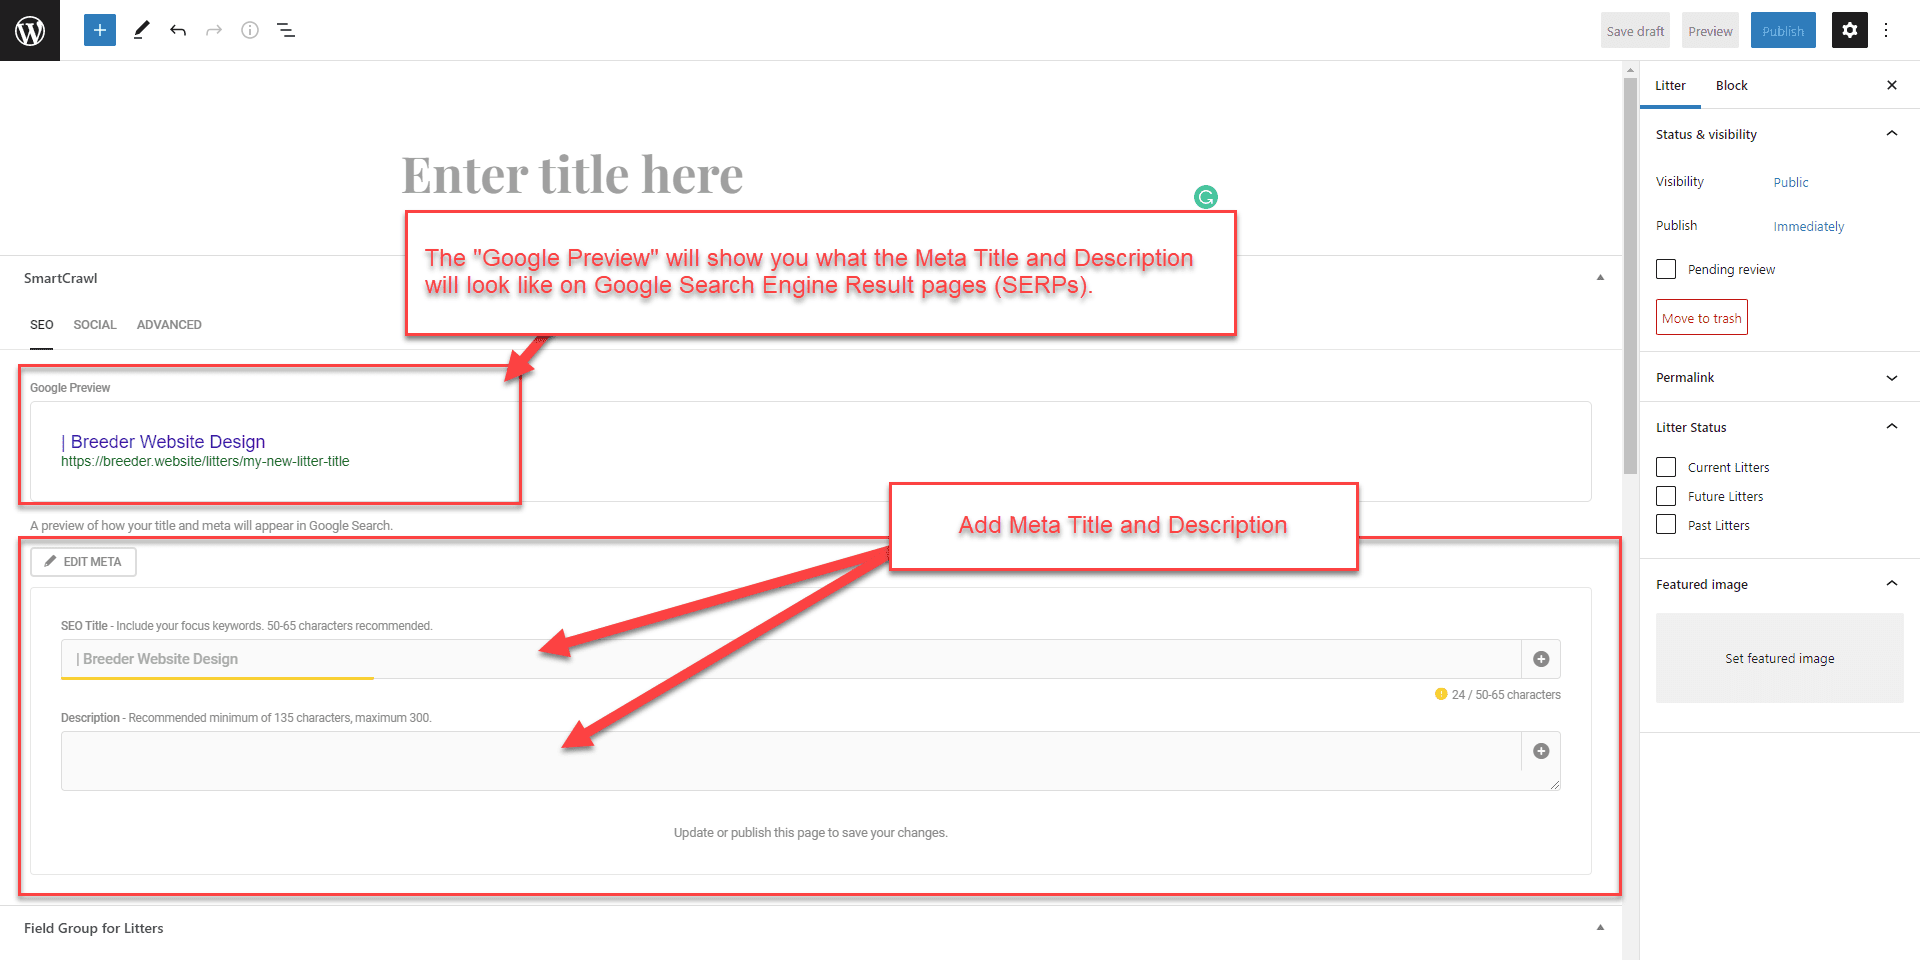
The SmartCrawl section is where you’ll manage the Meta Title and Description. This is what Google shows on Search Engine Result Pages (SERPs). To learn more about Meta Titles and Descriptions, read How to create the right meta description.
Click on “Edit Meta” to open the “SEO Title” and “Description” fields and add a title and description.
Litter Status
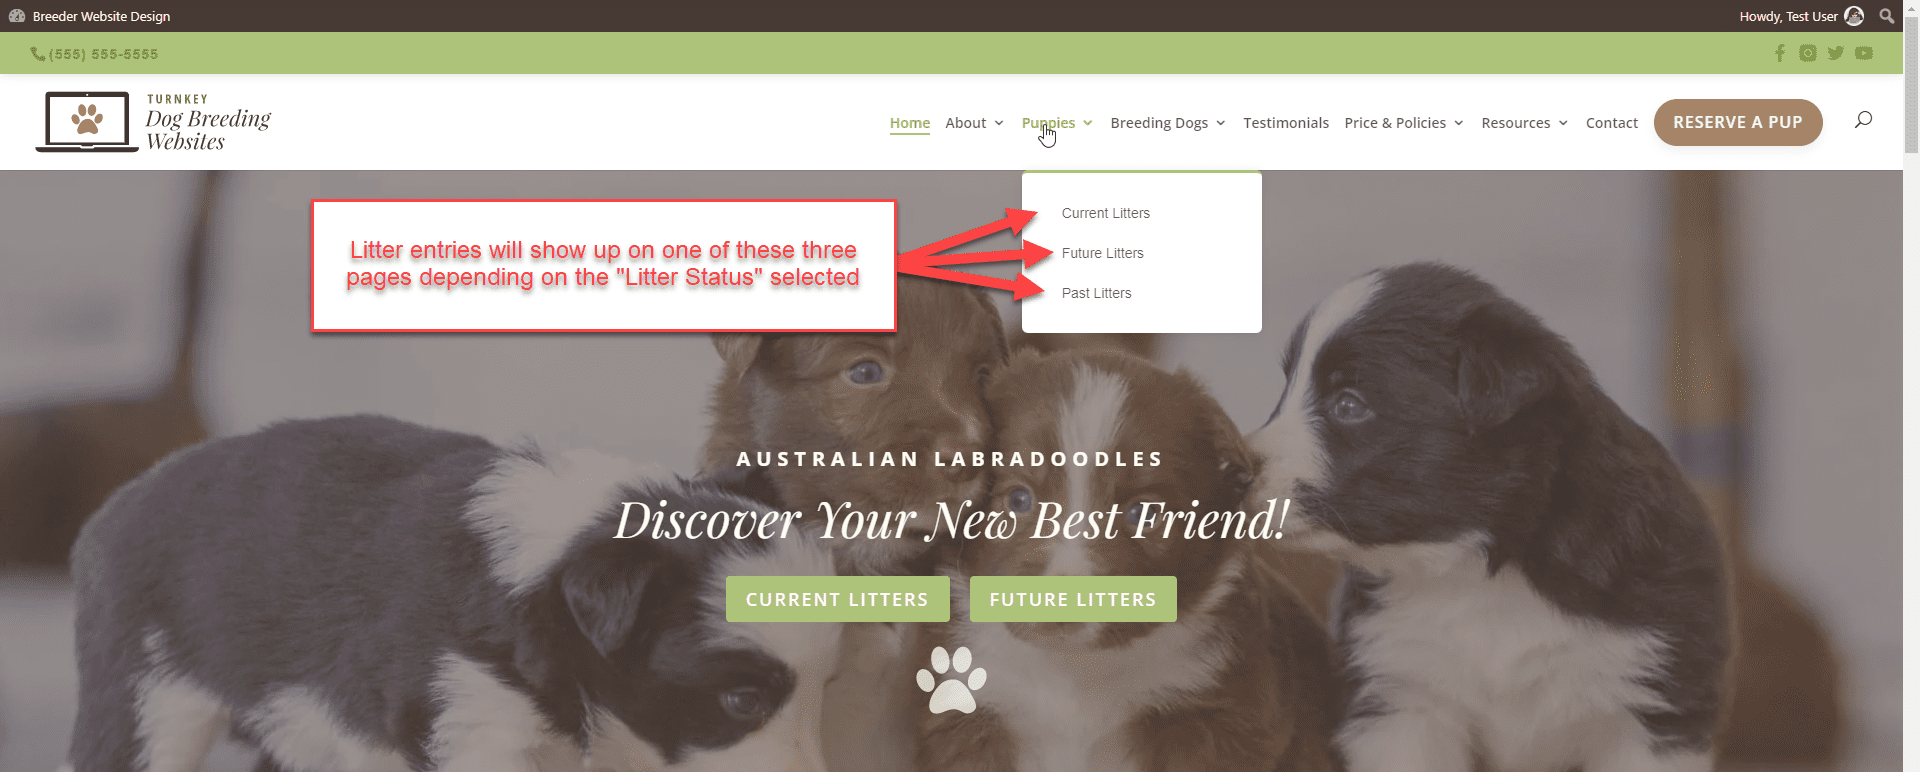
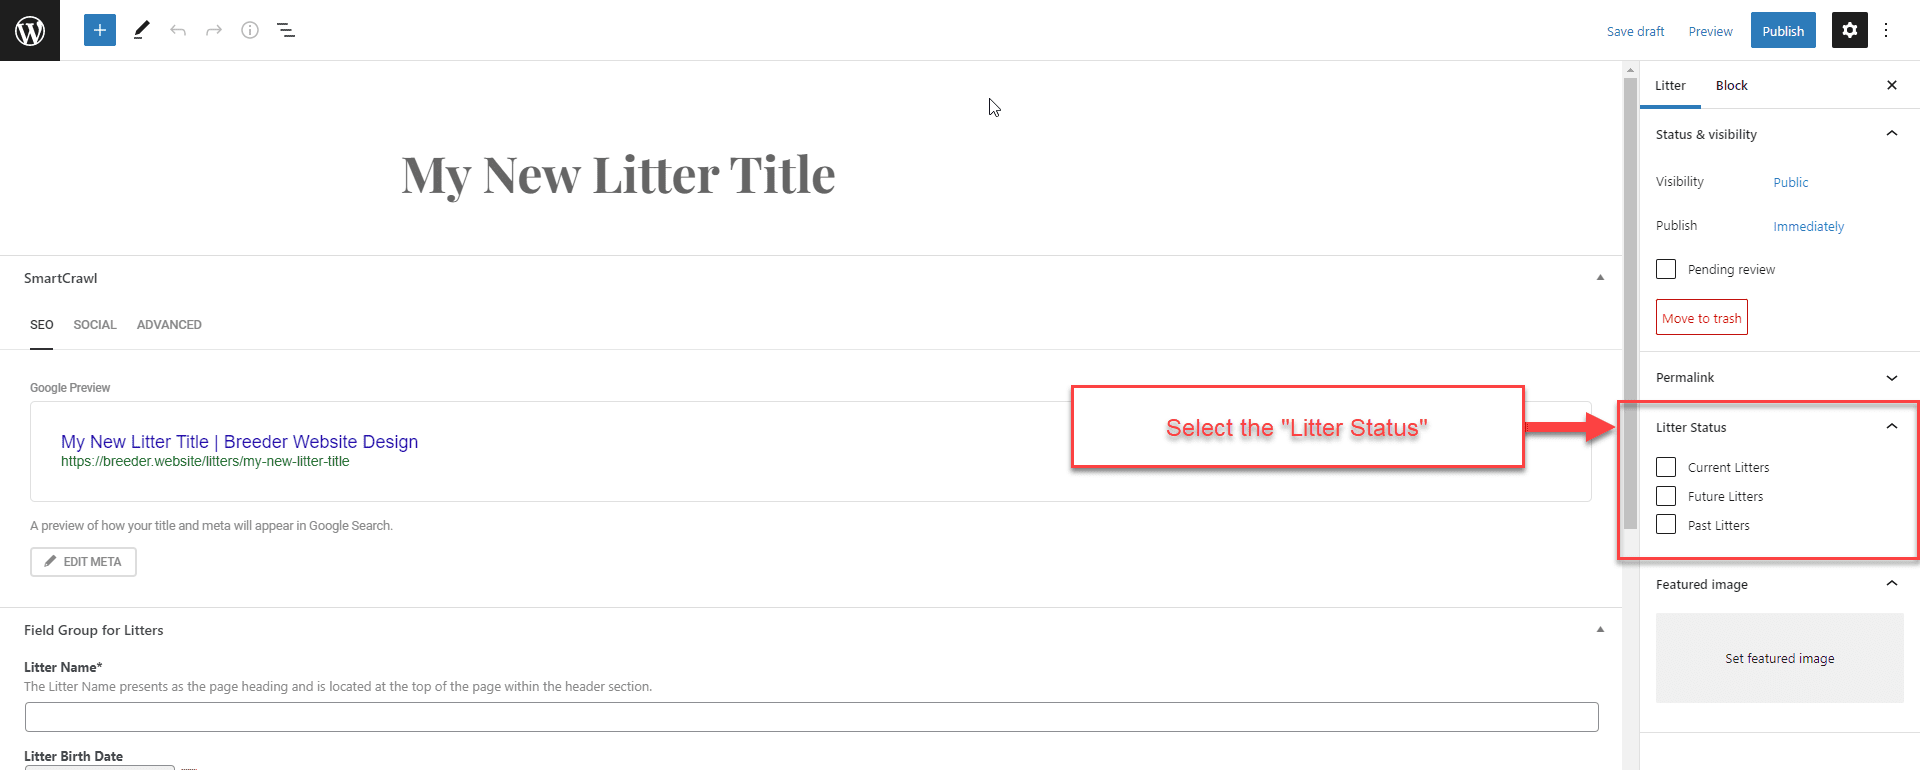
As Litters progress from Future to Current to Past, you’ll edit the litter entry and update the “Litter Status” to coincide. There are three litter statuses. Which one you select will dictate where the entry web page will be located on the front of the website.
The “Litter Status” options can be found in the right sidebar. Select the relevant status.
As Litters progress from Future to Current to Past, edit the litter entry and update the “Litter Status” field.
Featured Image
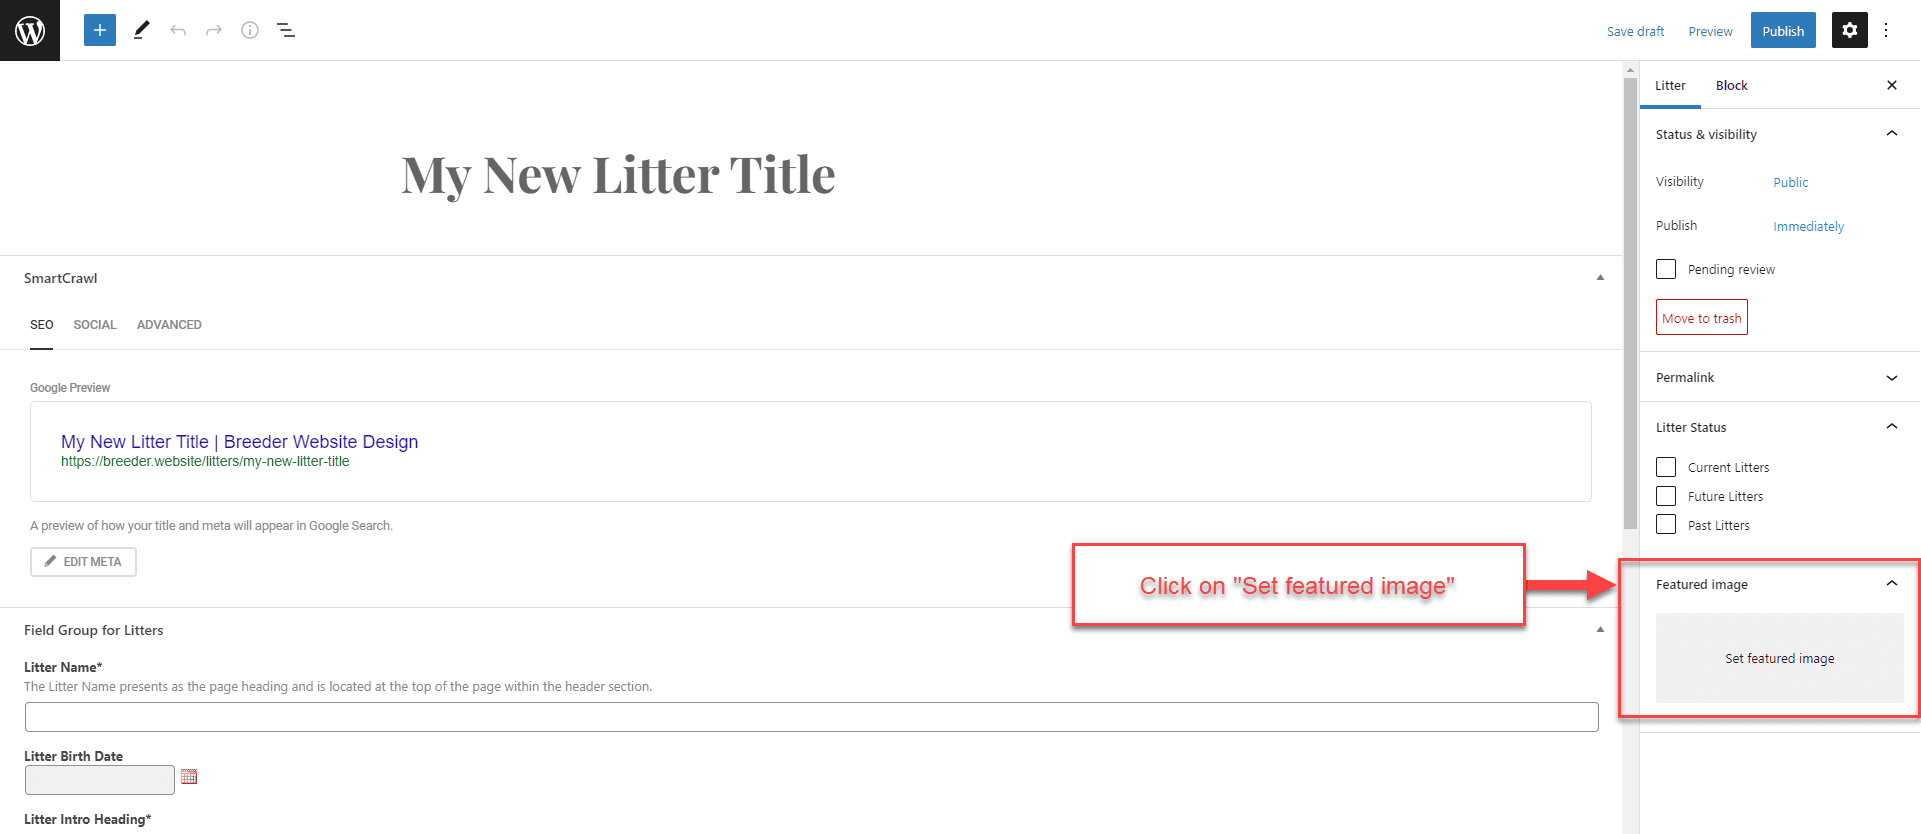
The “Featured Image” field is located in the right sidebar. Click on “Set featured image” to select or upload an image to the Media Library.
For feature and gallery images, the best aspect ratio to use is 16:9 with a size of 2000px wide X 1125px height. Learn more about what image types you can upload, optimal dimensions, and file sizes.
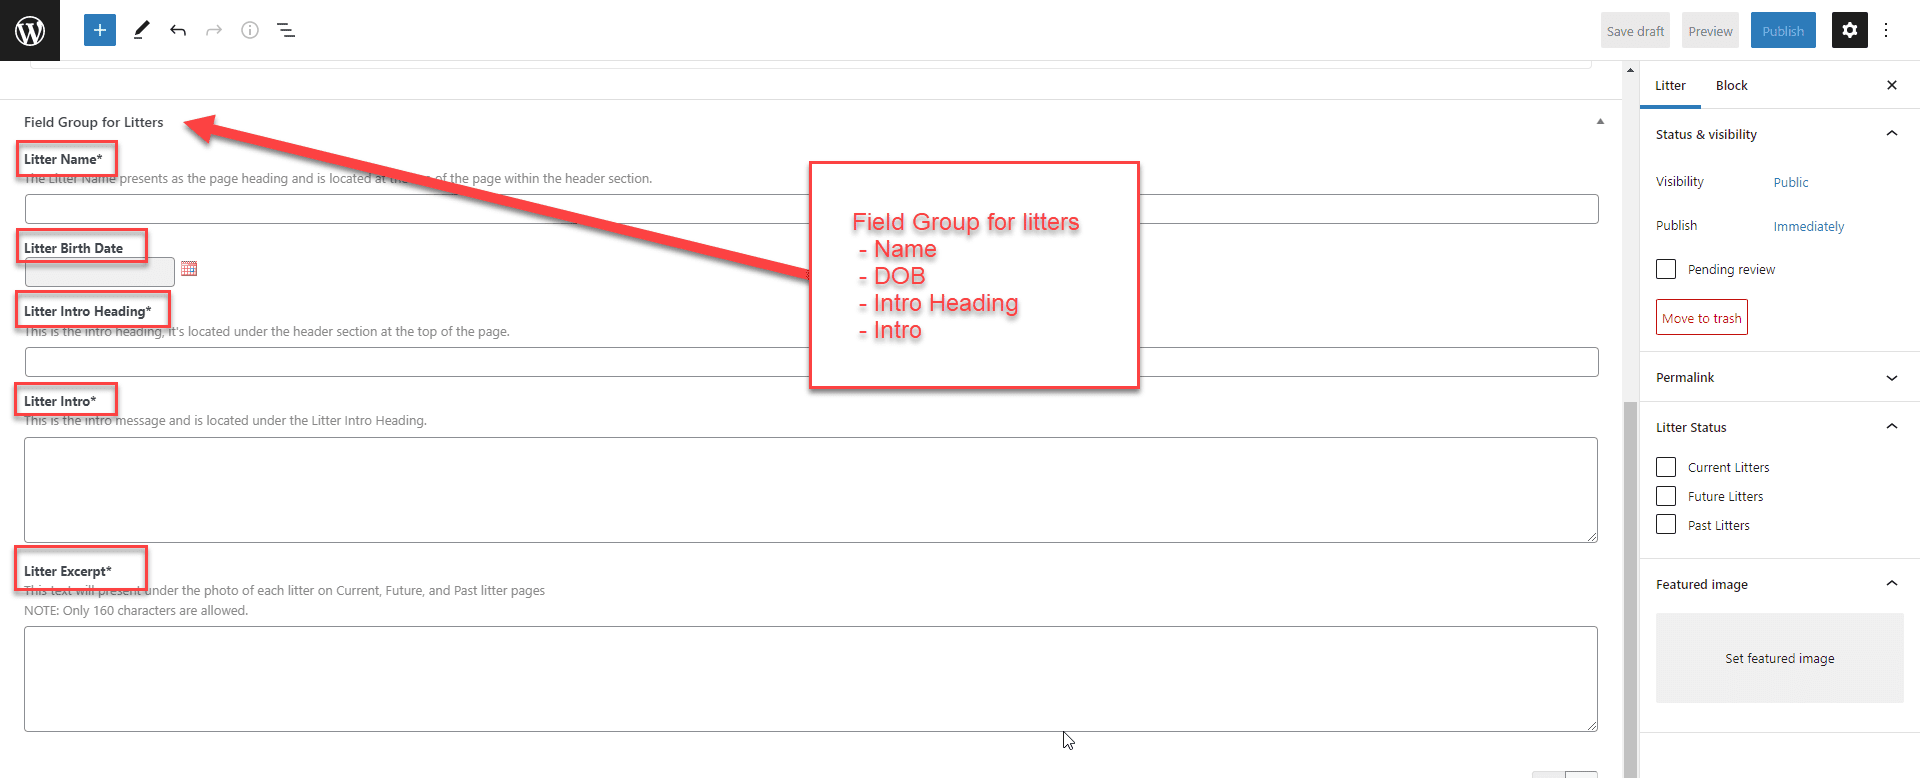
Field Group for Litters
This is where you’ll enter the following details about a litter.
- Litter Name (required field) – The Litter Name presents as the page heading and is located under the page title at the top of the page.
- Litter Birth Date – After the puppies are born, you can edit the litter entry and add their birth date.
- Litter Intro (required fields )
- Litter Heading – The intro heading is located under the header section at the top of the page.
- Litter Intro – The intro message is located under the Litter Intro Heading.
- Litter Excerpt (required field) – This is the short description text shown under the photo of each litter on Current, Future, and Past litter pages. (NOTE: Only 160 characters are allowed.)
Puppies in this Litter
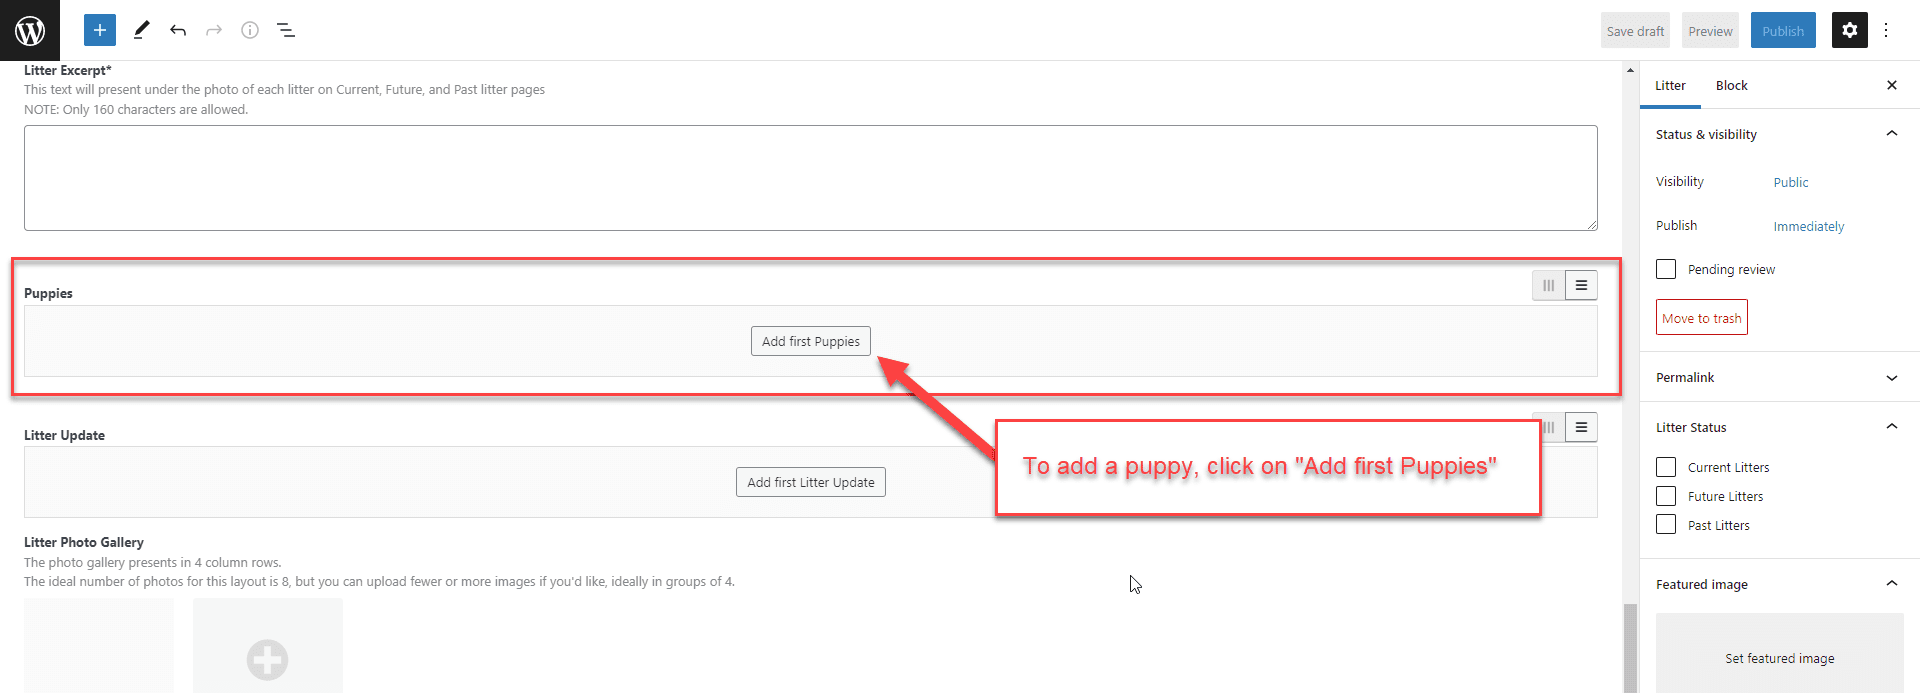
Once the puppies are born, you can add profiles for each puppy. Click on “Add First Puppy” to open a field group.
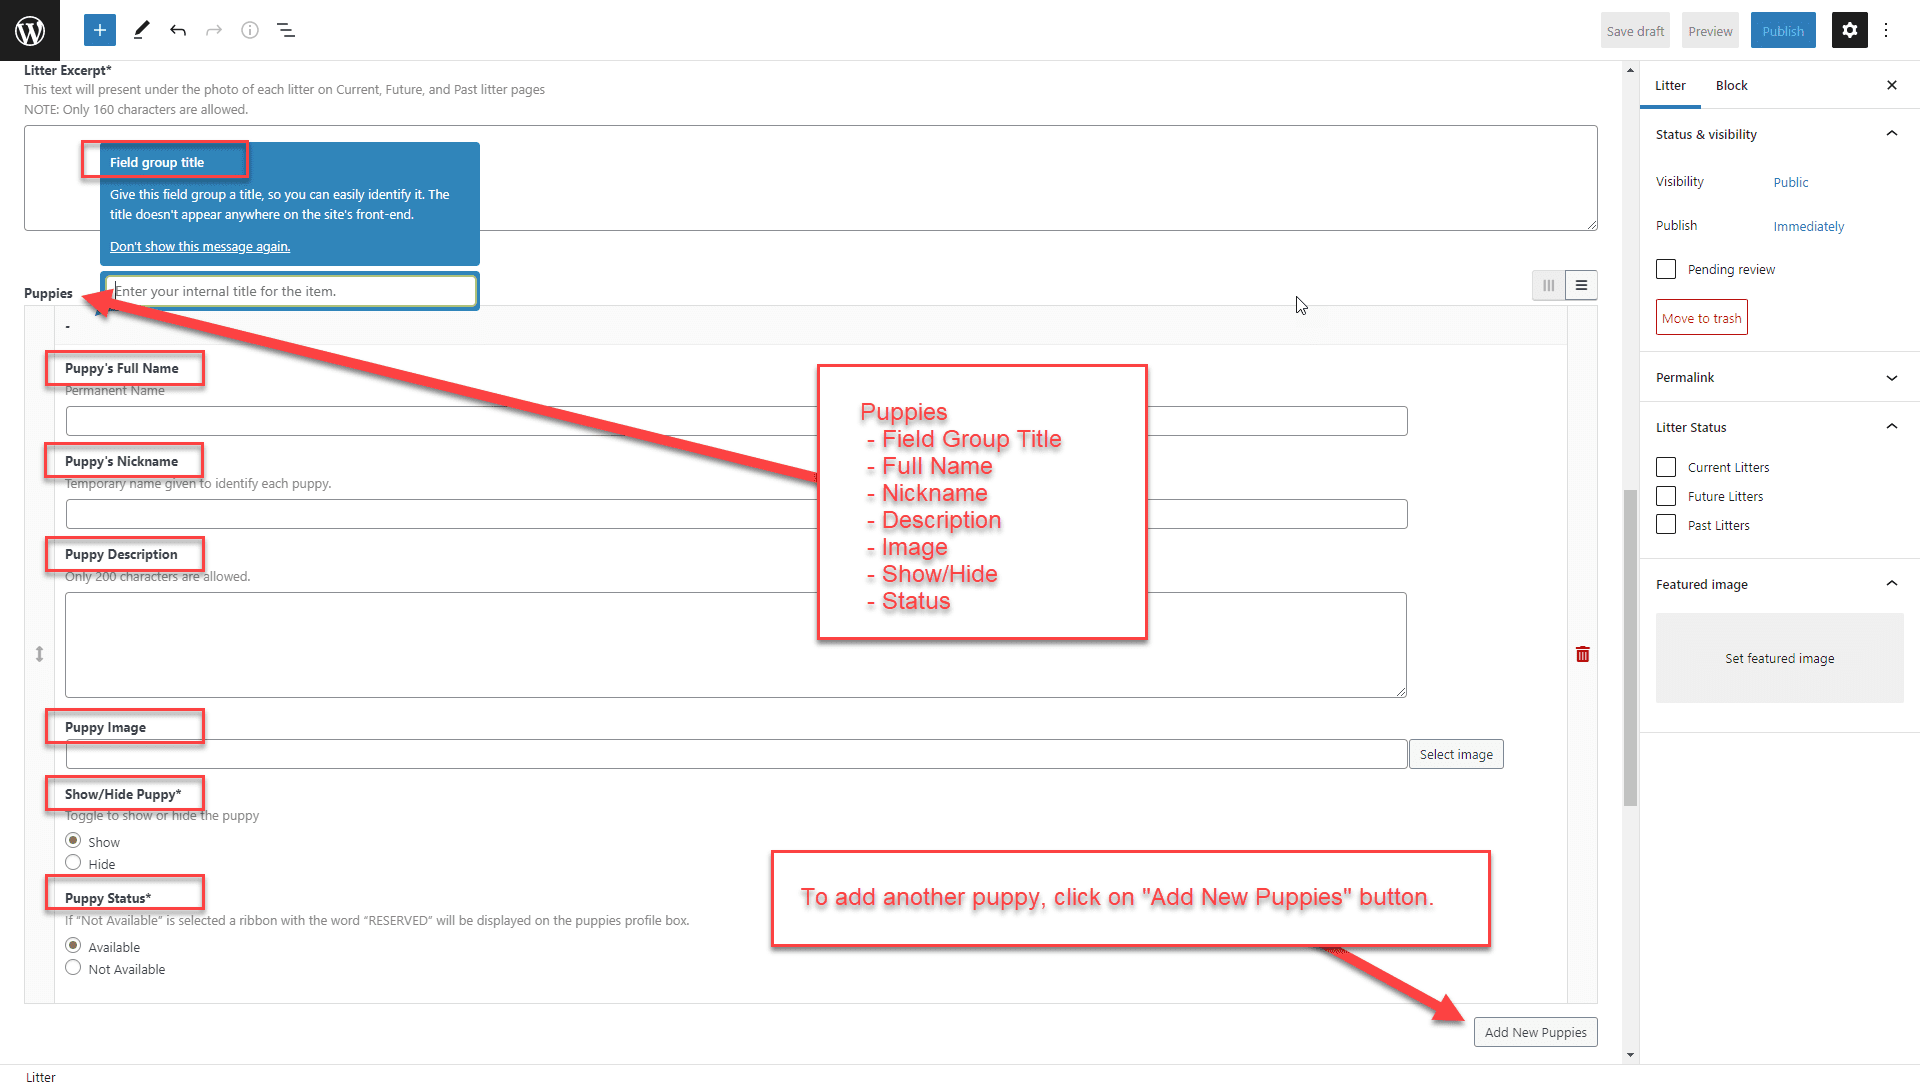
- Field Group Title – This title is a label to help you identify each puppy when the field group is collapsed. It does not appear anywhere on the front of the website.
- Puppy’s Full Name – Permanent name.
- Puppy’s Nickname – Temporary name given to identify each puppy.
- Puppy Description – Endearing puppy description. (NOTE: Only 200 characters are allowed.)
- Puppy Image – Upload puppy photo. The best aspect ratio to use is 16:9 with a size of 2000px wide X 1125px height. Learn more about what image types you can upload, optimal dimensions, and file sizes.
- Show/Hide Puppy (required field) – Toggle to show or hide the puppy.
- Puppy Status (required field) – Toggle to available or not available. If “Not Available” is selected, a ribbon with the word “RESERVED” will be displayed on the puppy’s profile box.
To add another puppy, click on the “Add New Puppy” button, and another field group will appear.
Litter Updates
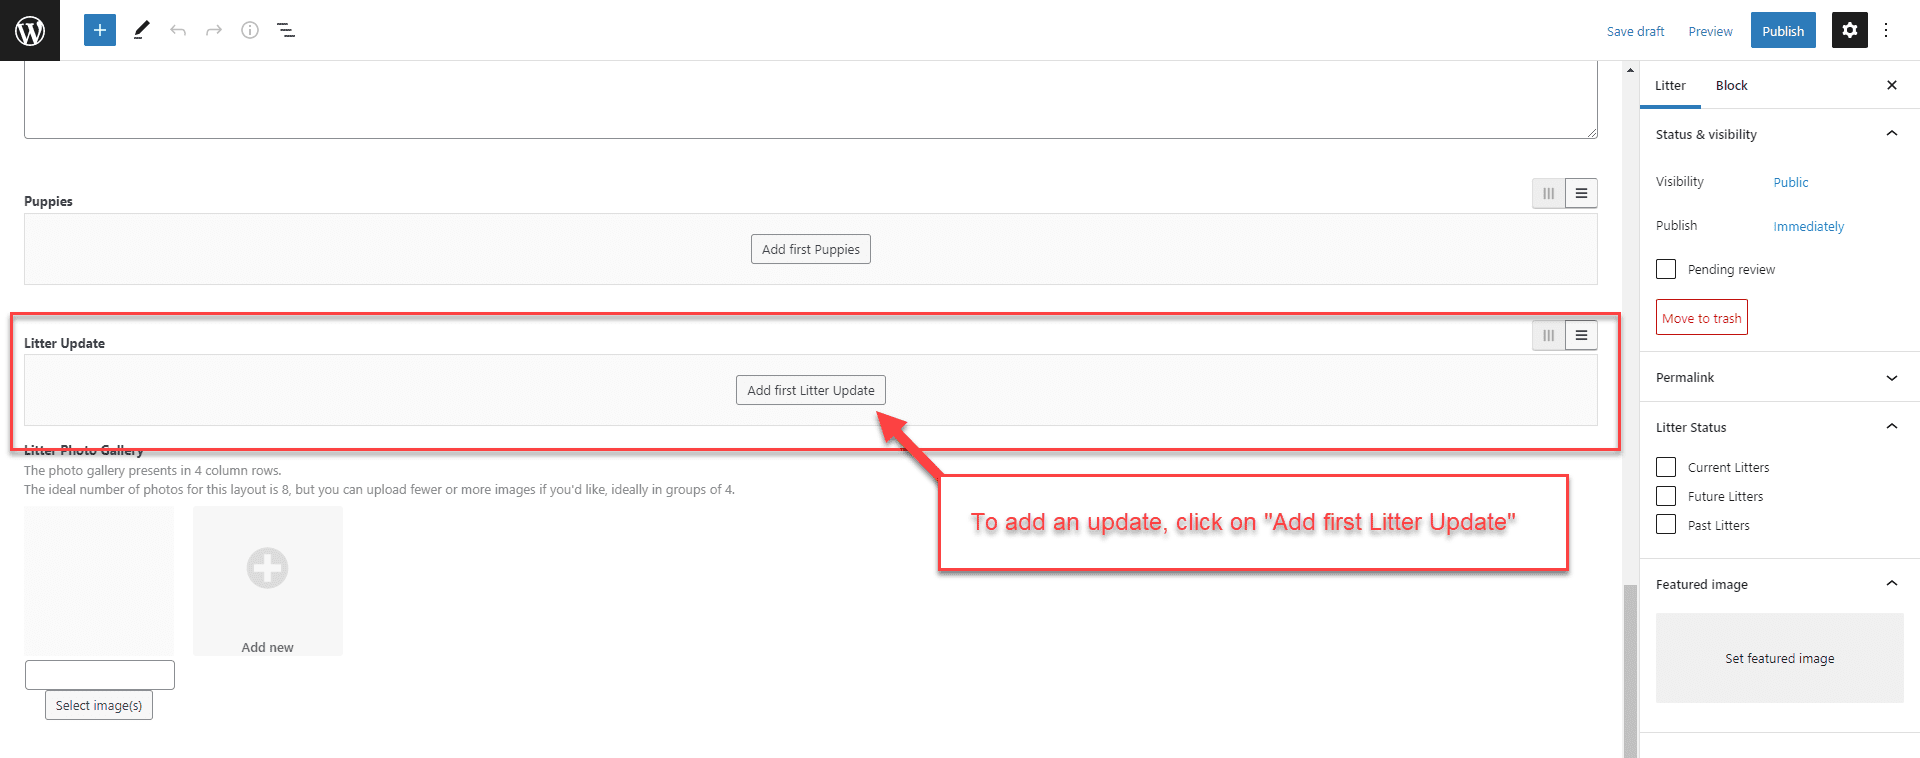
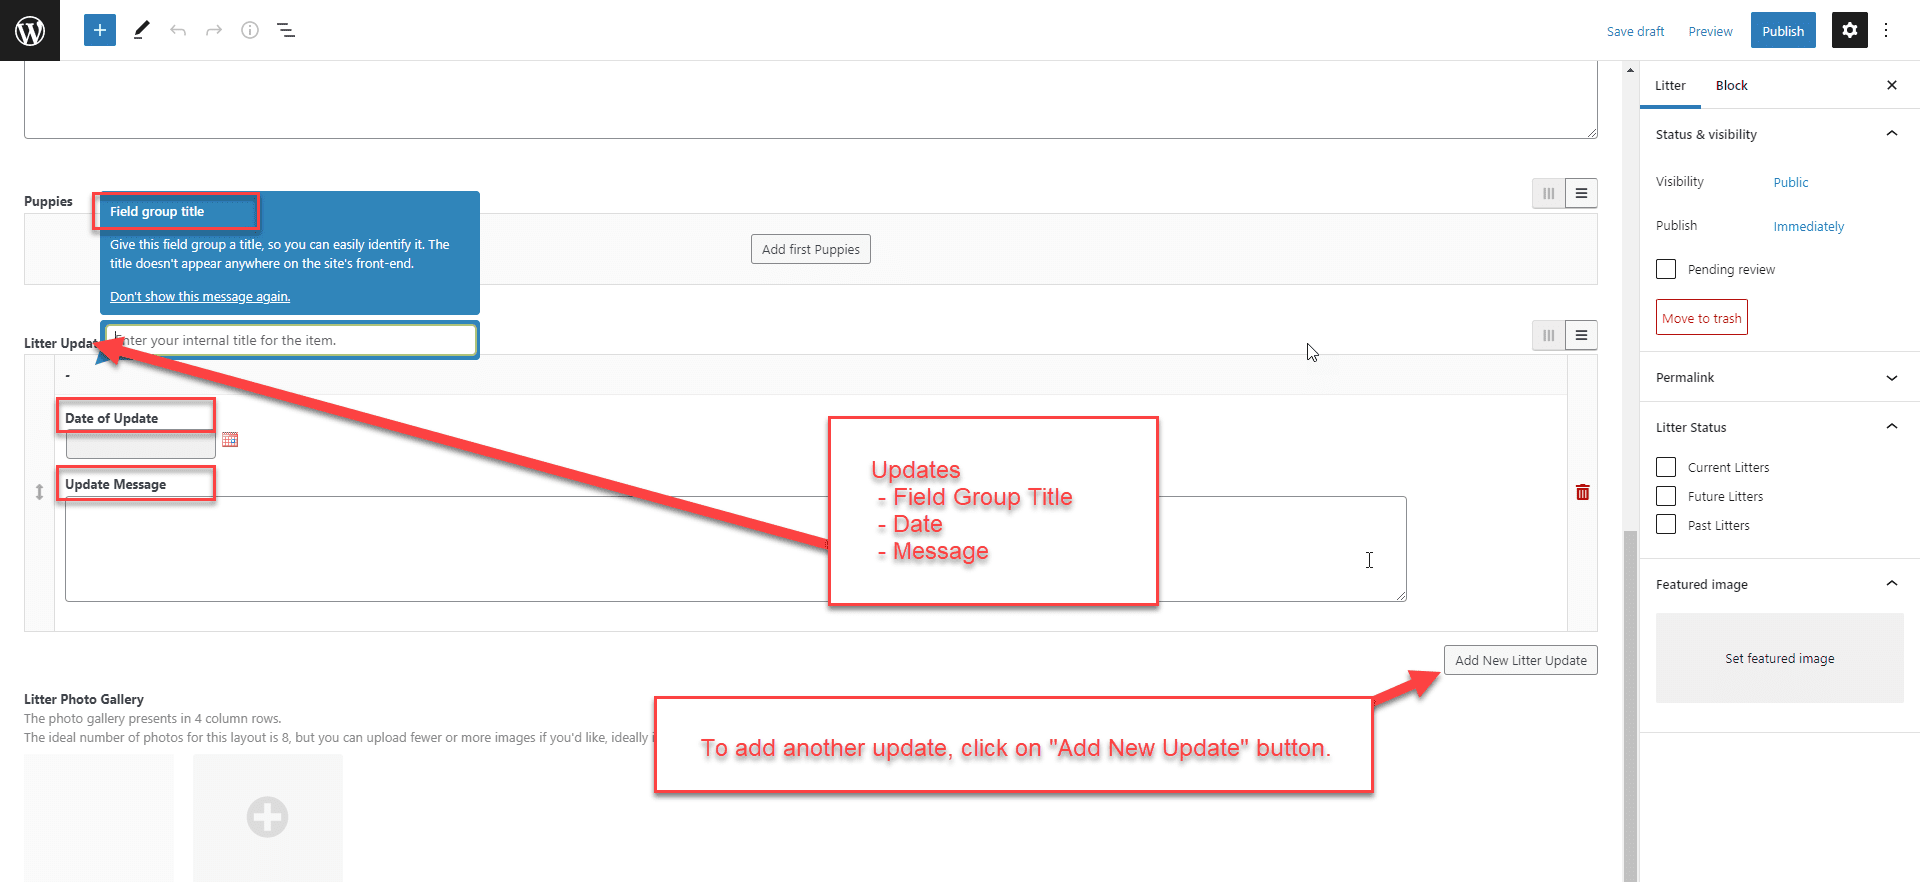
To give readers updates on litters and their progress, you can add dated messages. To start, click on “Add first Litter Update” to open a field group.
- Field Group Title – This title is a label to help you identify each update when the field group is collapsed. It does not appear anywhere on the front of the website.
- Date of Update
- Update Message
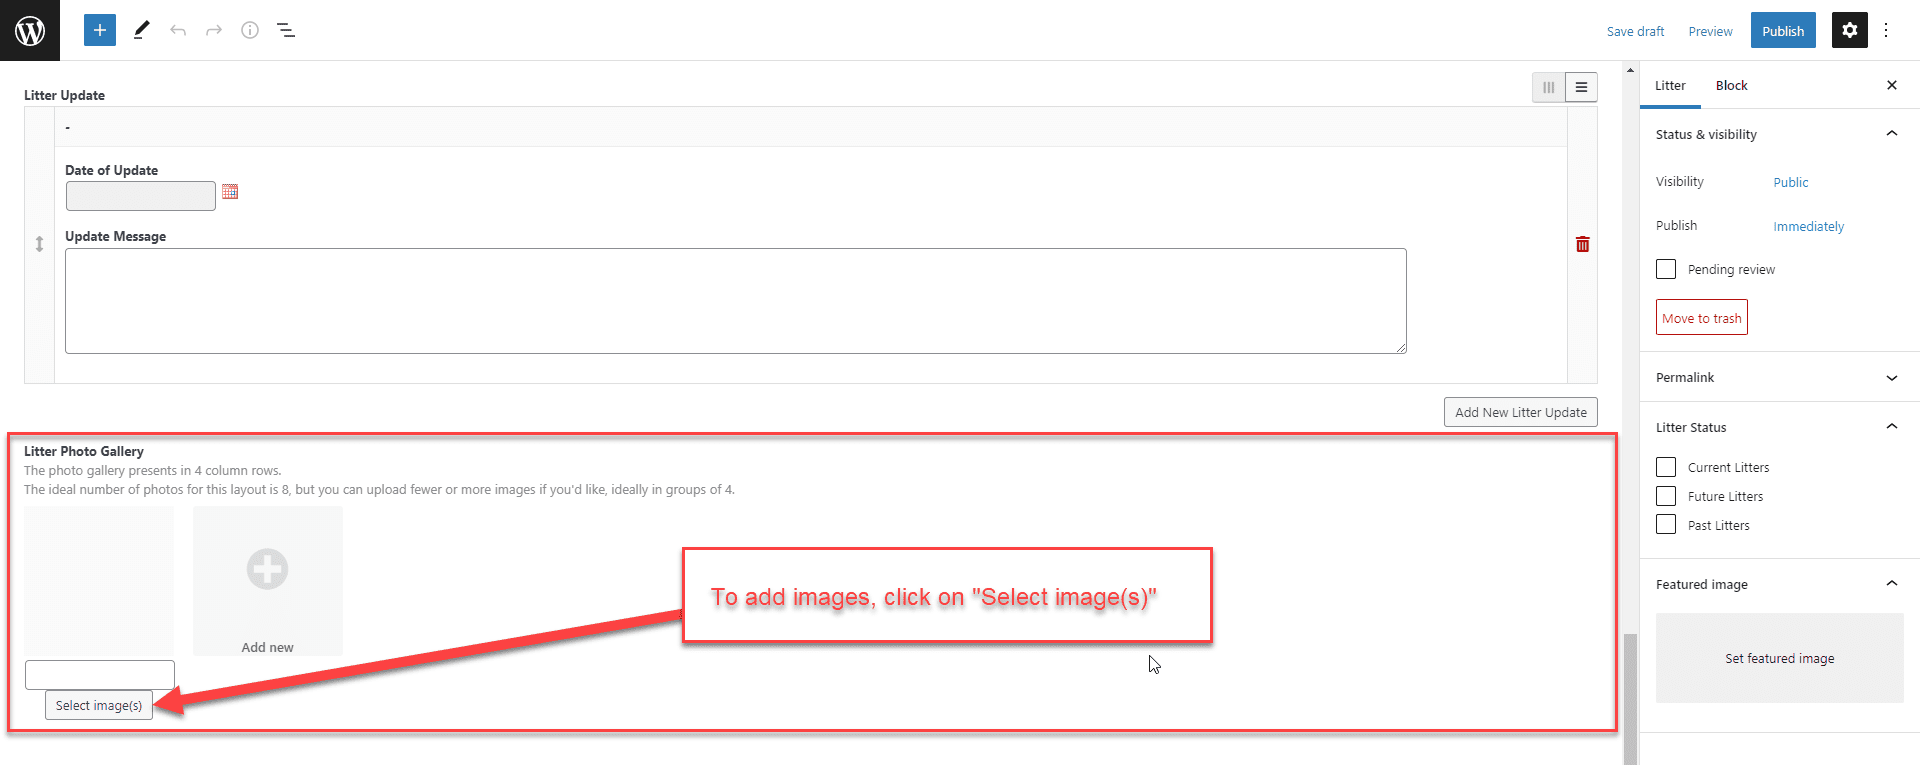
Litter Photo Gallery
The photo gallery presents in 4 column rows on the front of the website. The ideal number of photos for this layout is 8, but you can upload fewer or more images if you like, ideally in groups of 4.
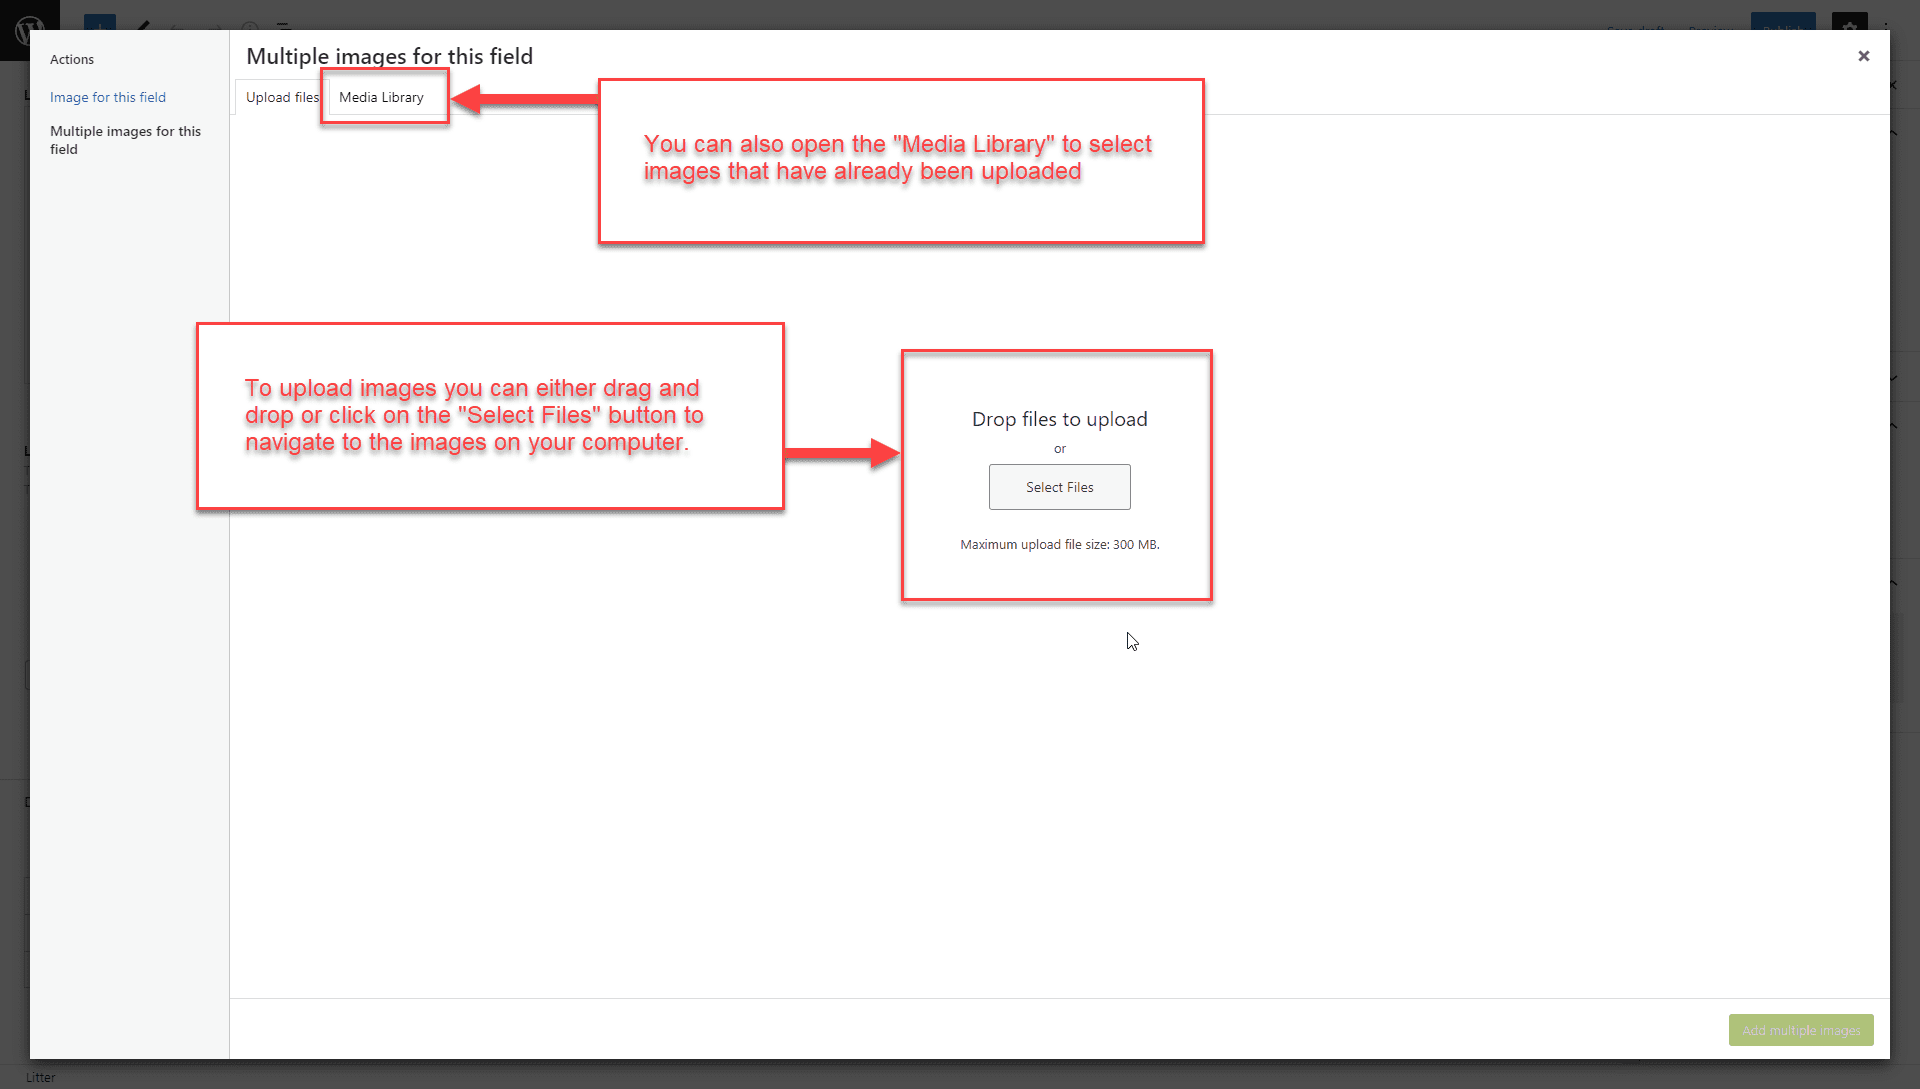
For feature and gallery images, the best aspect ratio to use is 16:9 with a size of 2000px wide X 1125px height. Learn more about what image types you can upload, optimal dimensions, and file sizes.
To learn more about the Media Library, read our Media Library support doc.
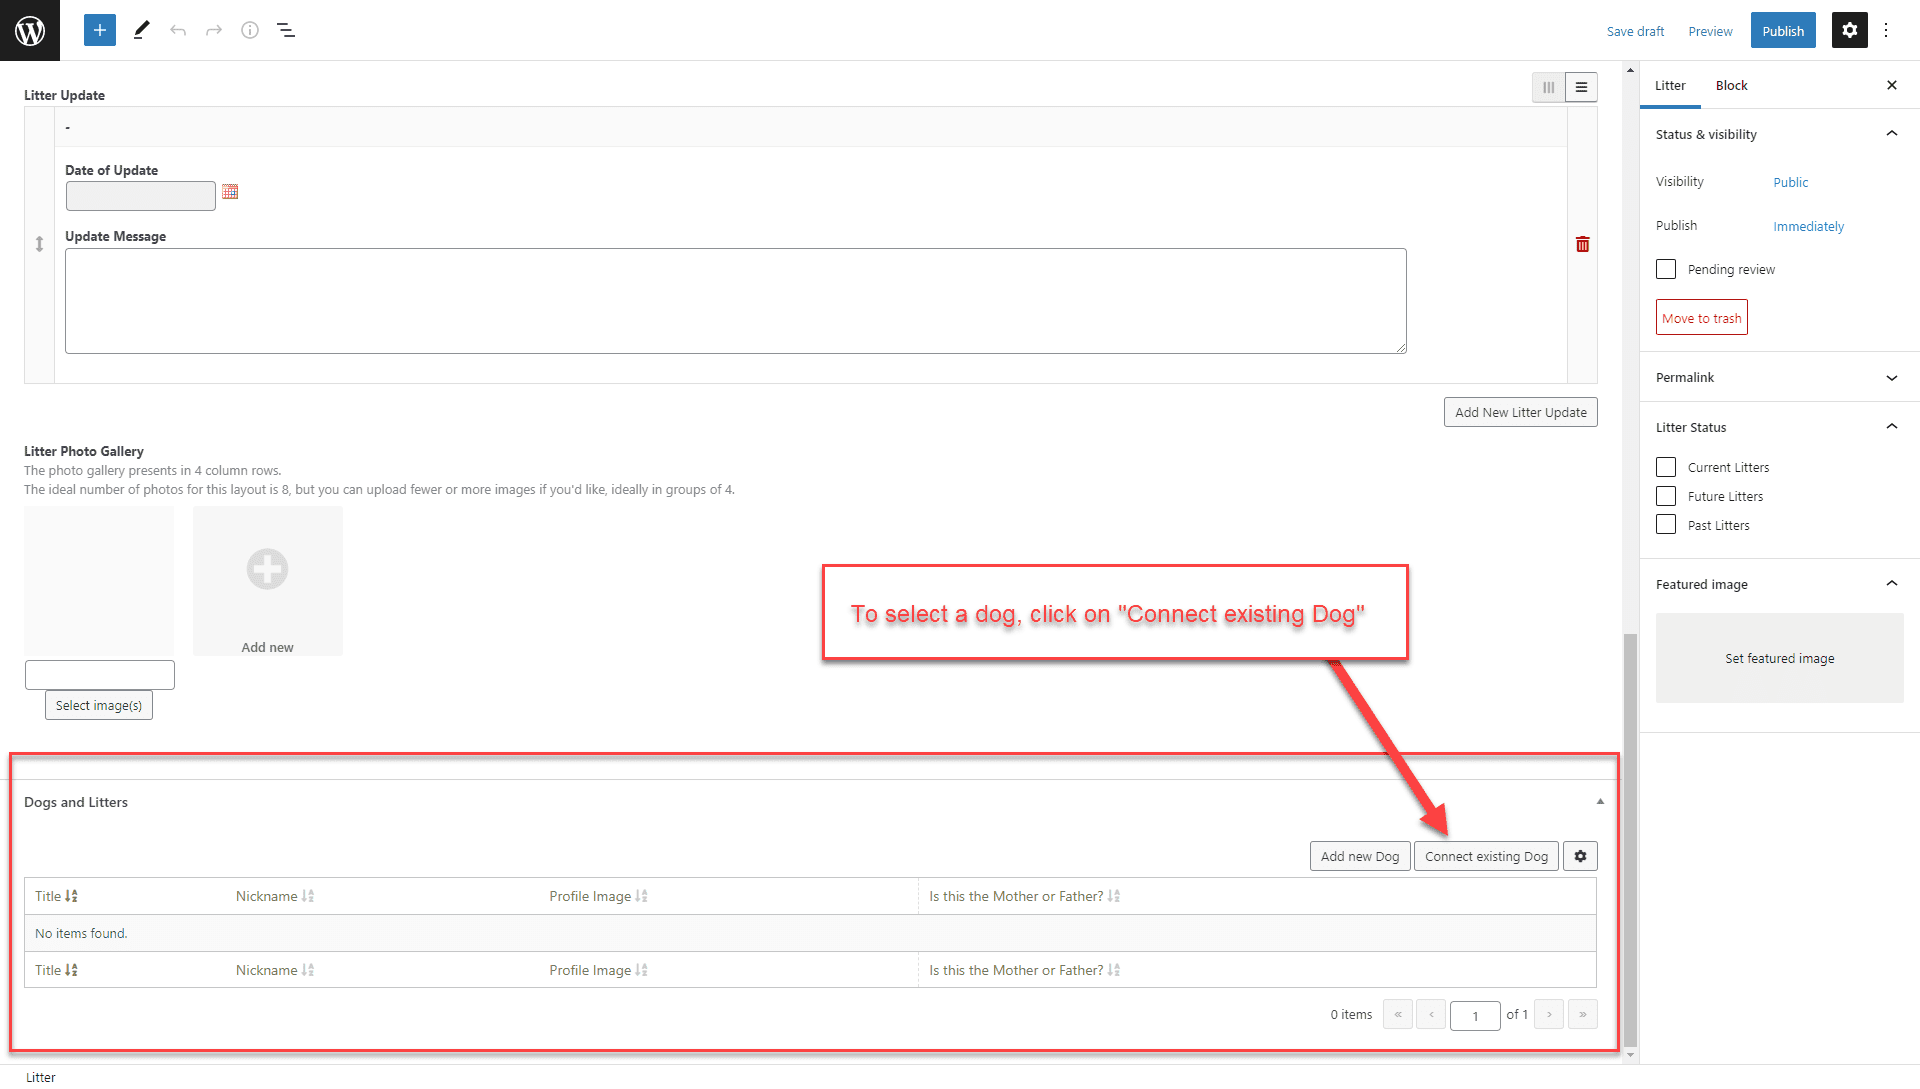
Dogs and Litters
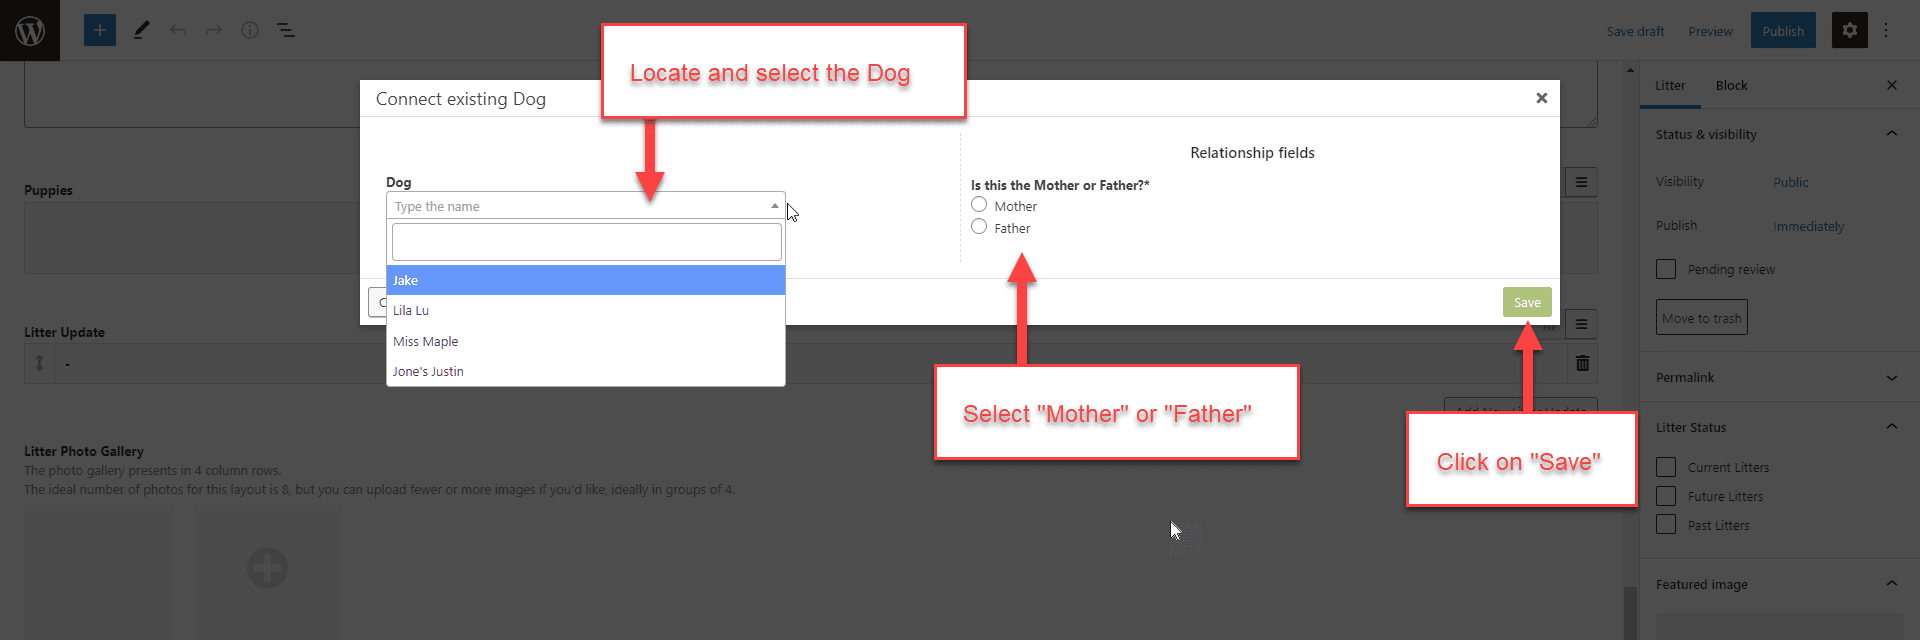
The Dogs and Litter field group is to associate which dogs are the litter’s parents. To start, click on the “Connect Existing Dog” button.
Find and select a dog in the window that opens up, select Mother or Father, and Save.
- Dog
- Is this the Mother or Father? (required field)
Repeat this process to select the other parent.
Though it’s possible to add a new dog from the litter entry, it would be better to add dogs within the Dogs Section of the website backend (Dogs > Add New) and use this interface to connect existing dog entries.
Editing Litters
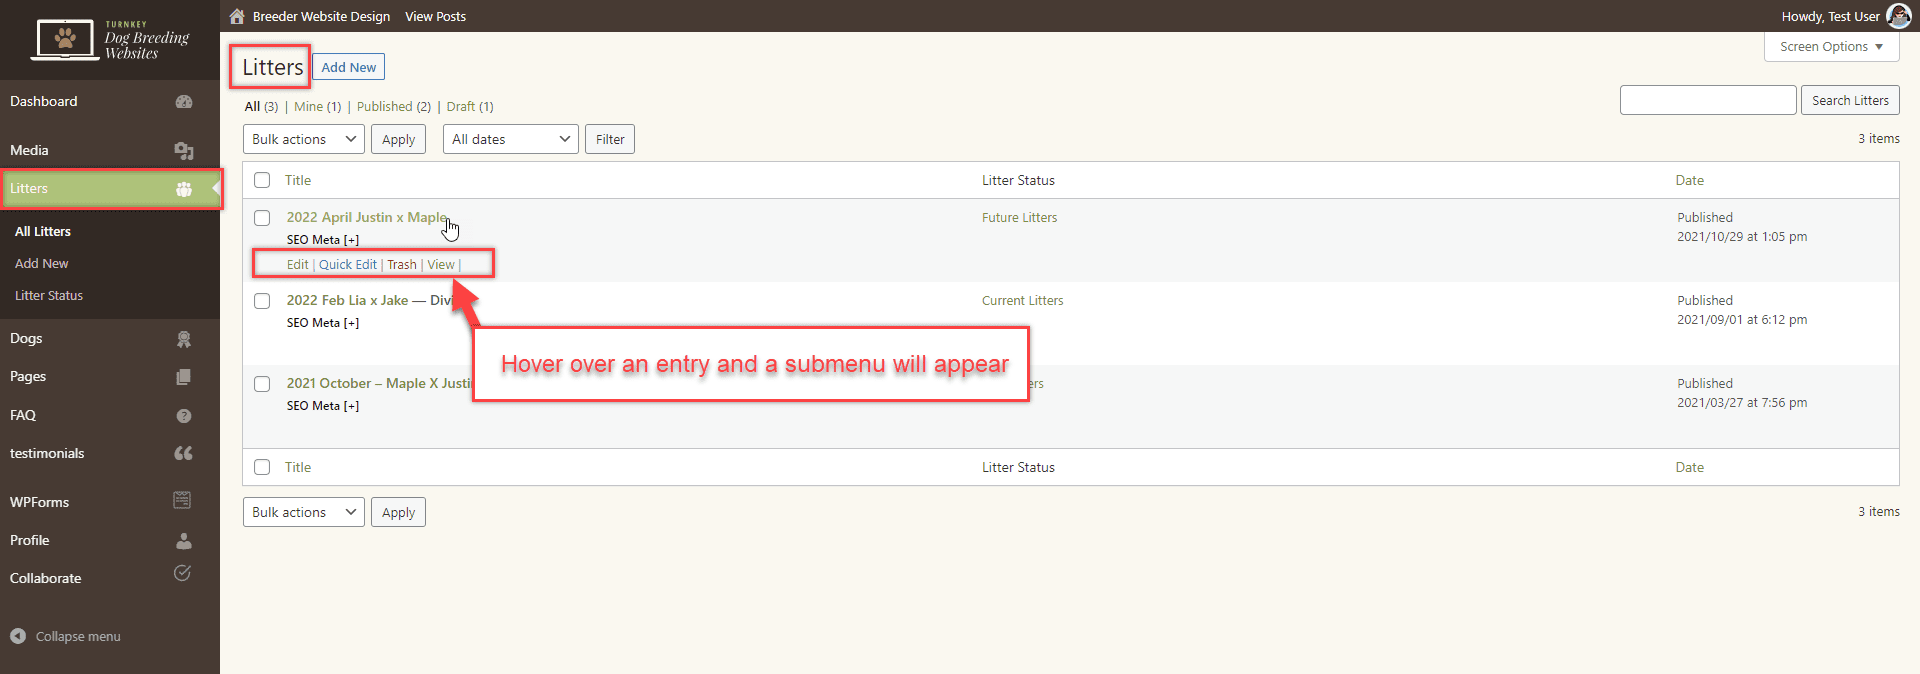
Log in and navigate to the “Litters” section to edit a litter. If you hover over an entry, a submenu will appear with the following options: Edit | Quick Edit | Trash | View |.
Edit
Clicking “Edit” will open a page where you can add or edit all the associated information with the litter entry.
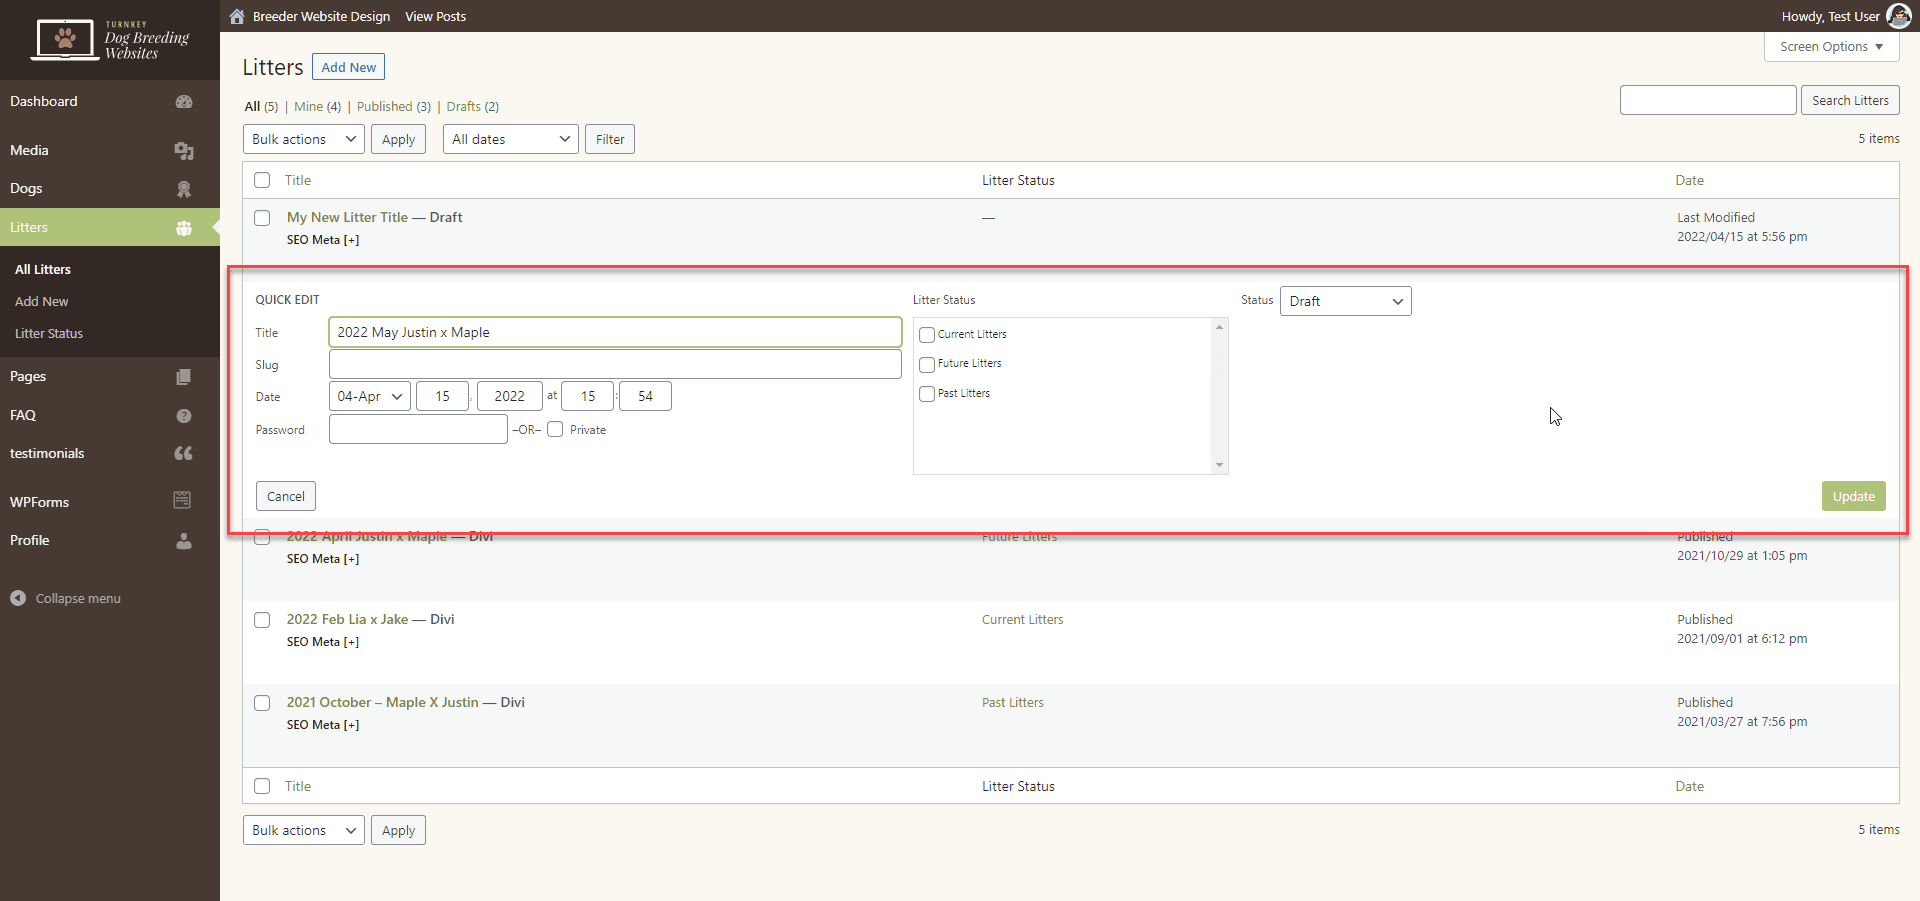
Quick Edit
Clicking “Quick Edit” will keep you on the same page and open a form where you can modify the following entry details: title, slug, date, password, privacy, litter status, and status.
Trash
By clicking “Trash,” you’ll move the entry to the trash.
View
By clicking “View,” you’ll open the entry on the frontend of the website.
