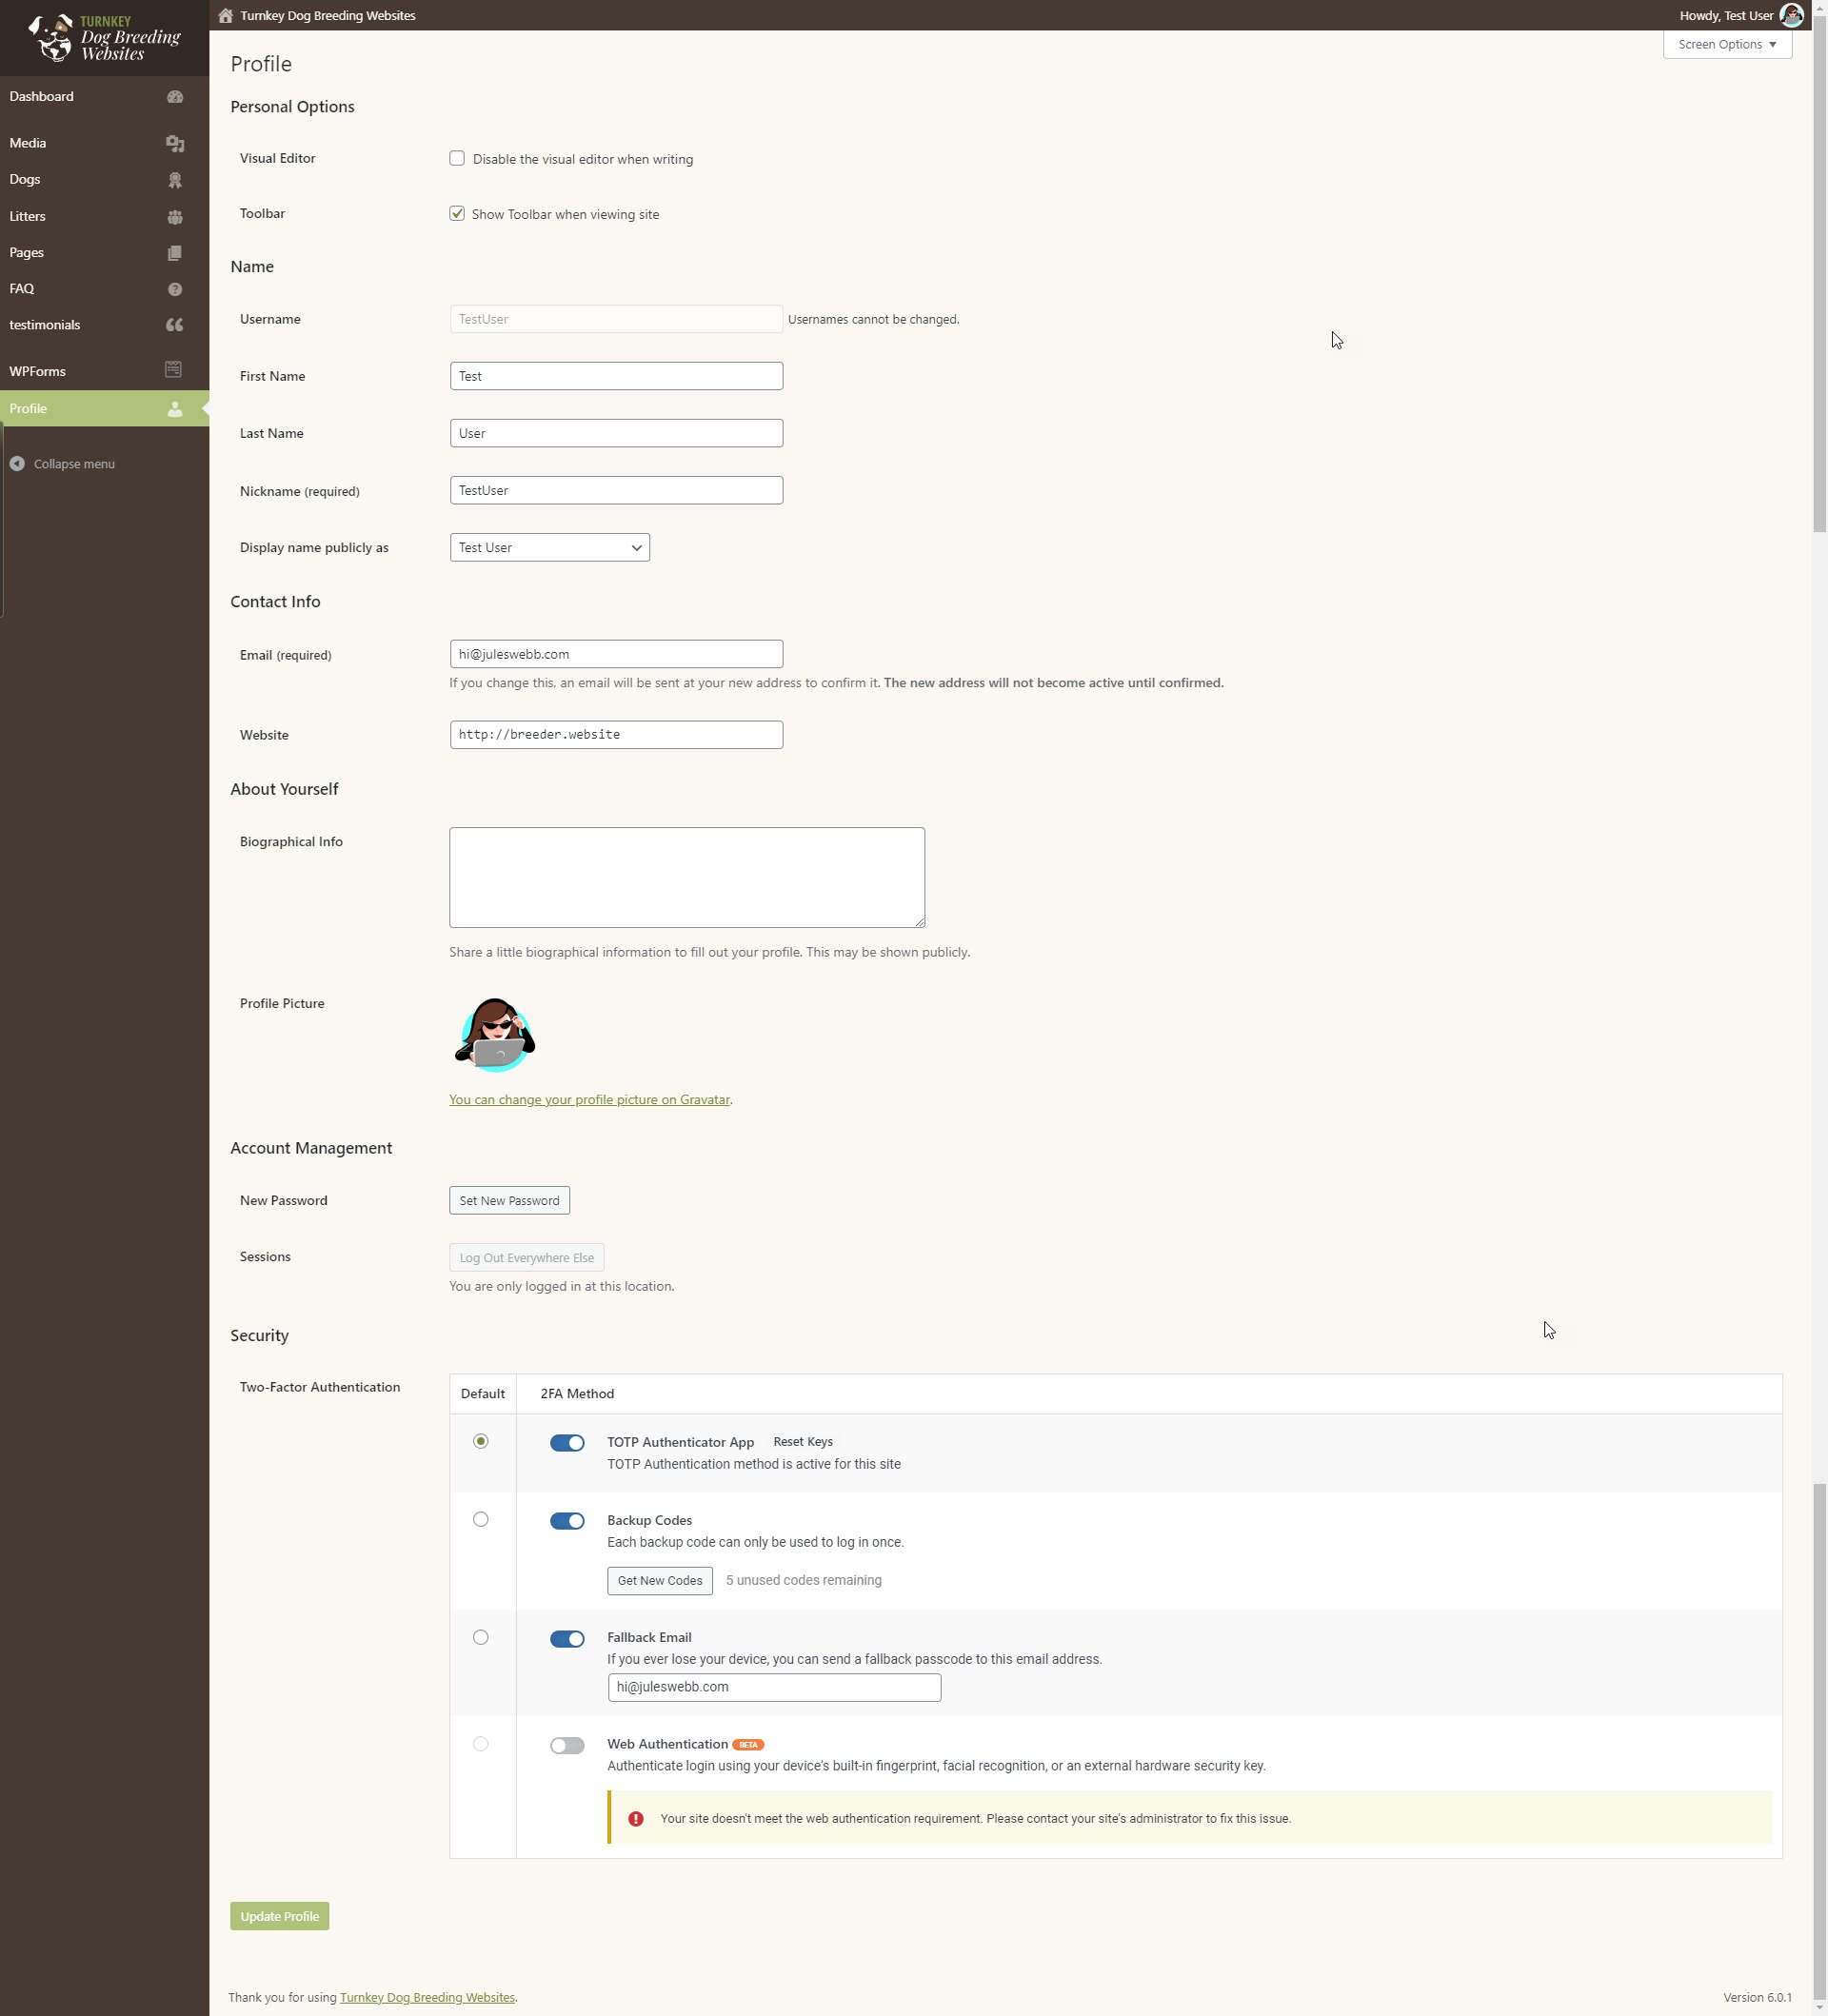
The Profile page is your user account. You can specify your name here and how it will be displayed on your site. This is also where you’ll find your email address (for administrative purposes), other personal information, personal options, and security settings.
Personal Options
- Visual Editor – Checking this box disables the visual editor when writing, and uses the plain HTML editor.
- Keyboard Shortcuts – This is related to comment moderation. Since comments are not enabled on your website, you can disregard this setting.
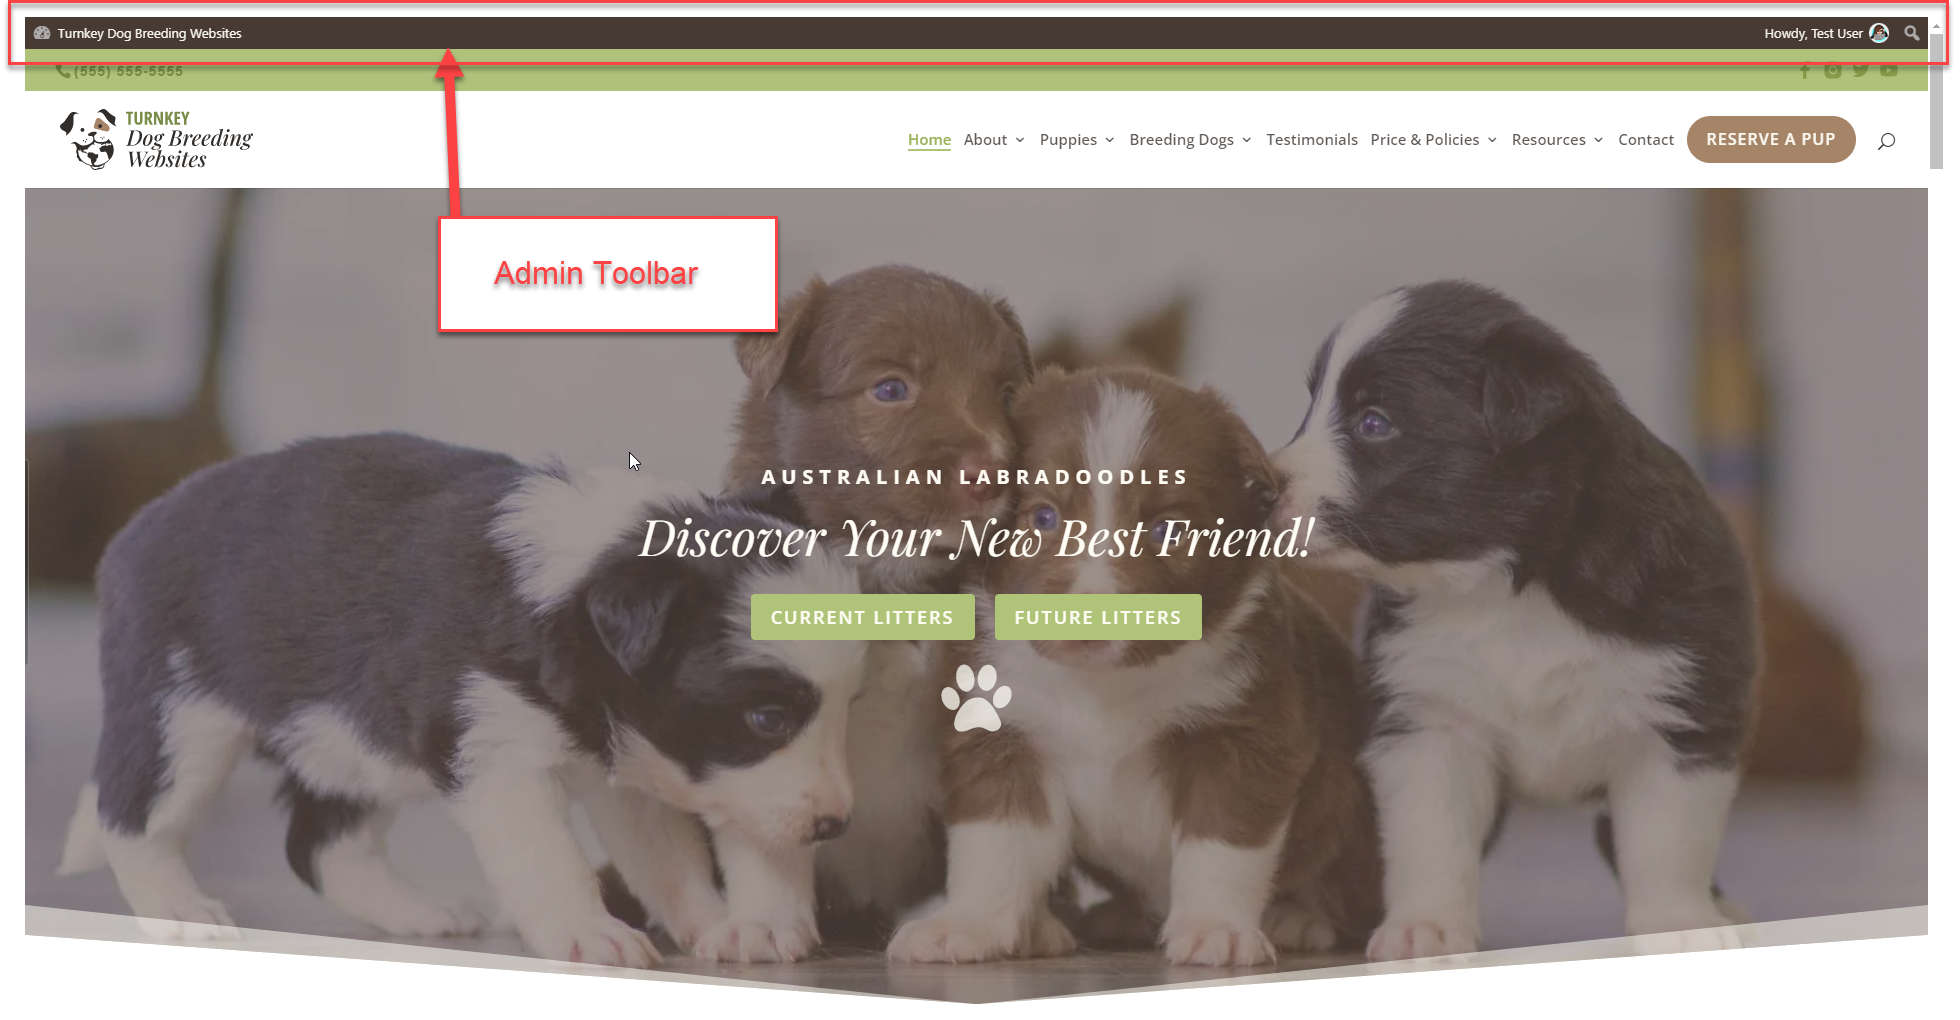
- Toolbar – Check the box to display the “Admin Toolbar” when you’re viewing your site.
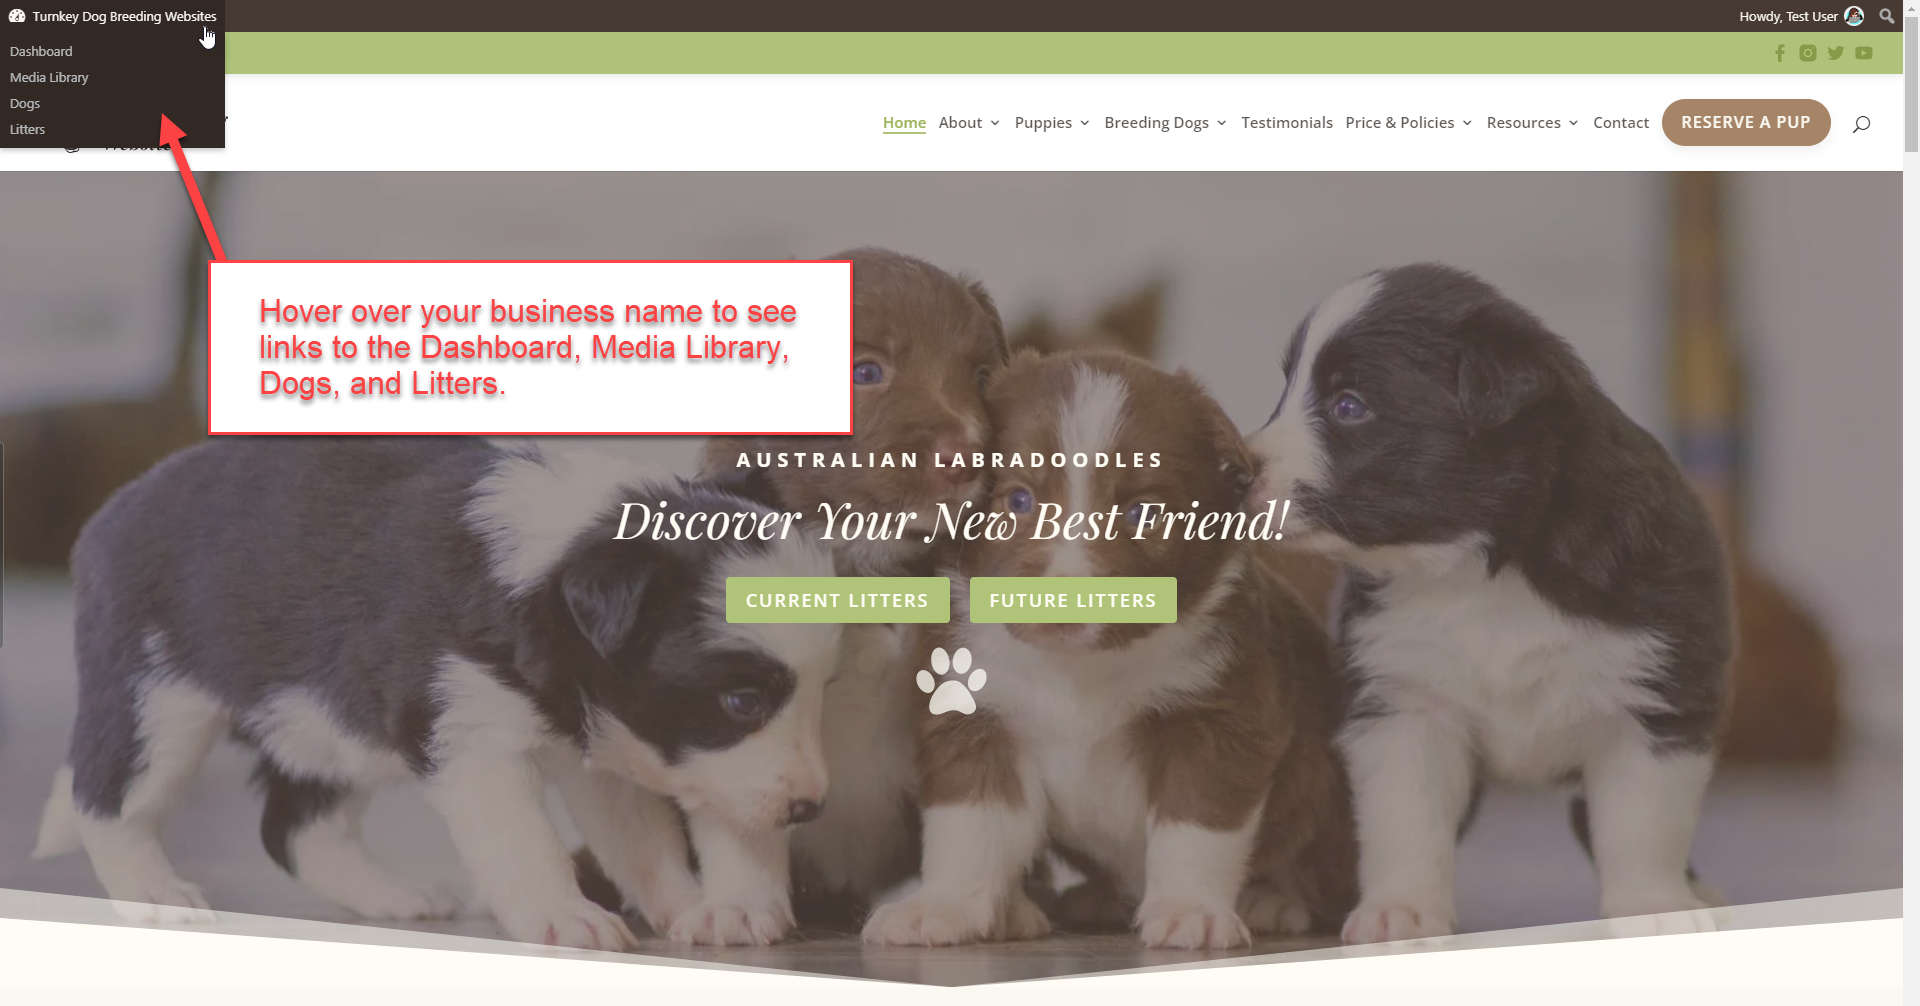
The Admin Toolbar is handy for two reasons: 1) When you see it, you know you’re logged into your website; 2) It provides a handy link to your Dashboard from the frontend of the website.
Name
- Username – You cannot edit your Username because it is used as your Username during the login process.
- First Name – Enter your first name in this text box.
- Last Name – Enter your last name in this text box.
- Nickname – Enter a nickname in this text box. It’s a required field for every user. It may be the same as your Username, or it can be different. If you don’t supply a nickname, then the Username will be placed in this field. Your nickname will appear when you’re logged in at the top right in the Admin Bar next to your profile image.
- Display name publicly as – From the drop-down field, select how you would like your name cited on the website. If you don’t choose one, this field will default to your first and last name. This is optional information that is not used anywhere on your website.
Contact Info
- Email – You can update your email address here.
- Website – You can enter your website address here if you’d like. This is optional information that is not used anywhere on your website.
About Yourself
- Biographical Info – You can enter a short description or profile of yourself here. This is optional information that is not used anywhere on your website.
- Profile Picture – Your picture in Gravatar is shown here. To create a Gravatar or change it, go to the Gravatar website. You can learn more at How to Use Gravatars. Your Profile Picture will appear when you’re logged in at the top right in the Admin Bar next to your Nickname.
Account Management
- Generate Password – Click this button to generate a new password for your account. This will show you a new field with a generated password. You may, however, create your own password. If you create a password that is weak, a checkbox will appear asking you to confirm that you want to use the weak password.
- Strength Indicator – This indicates if the password you entered is Very Weak, Weak, Medium, or Strong (displayed in green). The stronger the password, the more secure your login. Hint: The password should be at least seven characters long. To make it stronger, use upper and lower case letters, numbers, and symbols like !”?$%^&).
- Log Out Everywhere Else – You can click this button to log out of other devices, such as your phone or a public computer.
Security
- Two Factor Authentication – You’re required to set up two-factor authentication (2FA). 2FA provides an additional level of security to your website and is enforced by default. It’s just one aspect of an overall security strategy to keep your website safe and secure from hackers and other bad actors.
- Fallback email address – By default, this email address is your website account email address, but you can change it if you’d like.
Two-factor authentication adds another layer of security to your site. In addition to your username and password, an additional PIN will either be sent to your email or generated on your smartphone. This additional layer of security makes it harder for potential hackers to gain access to your website.
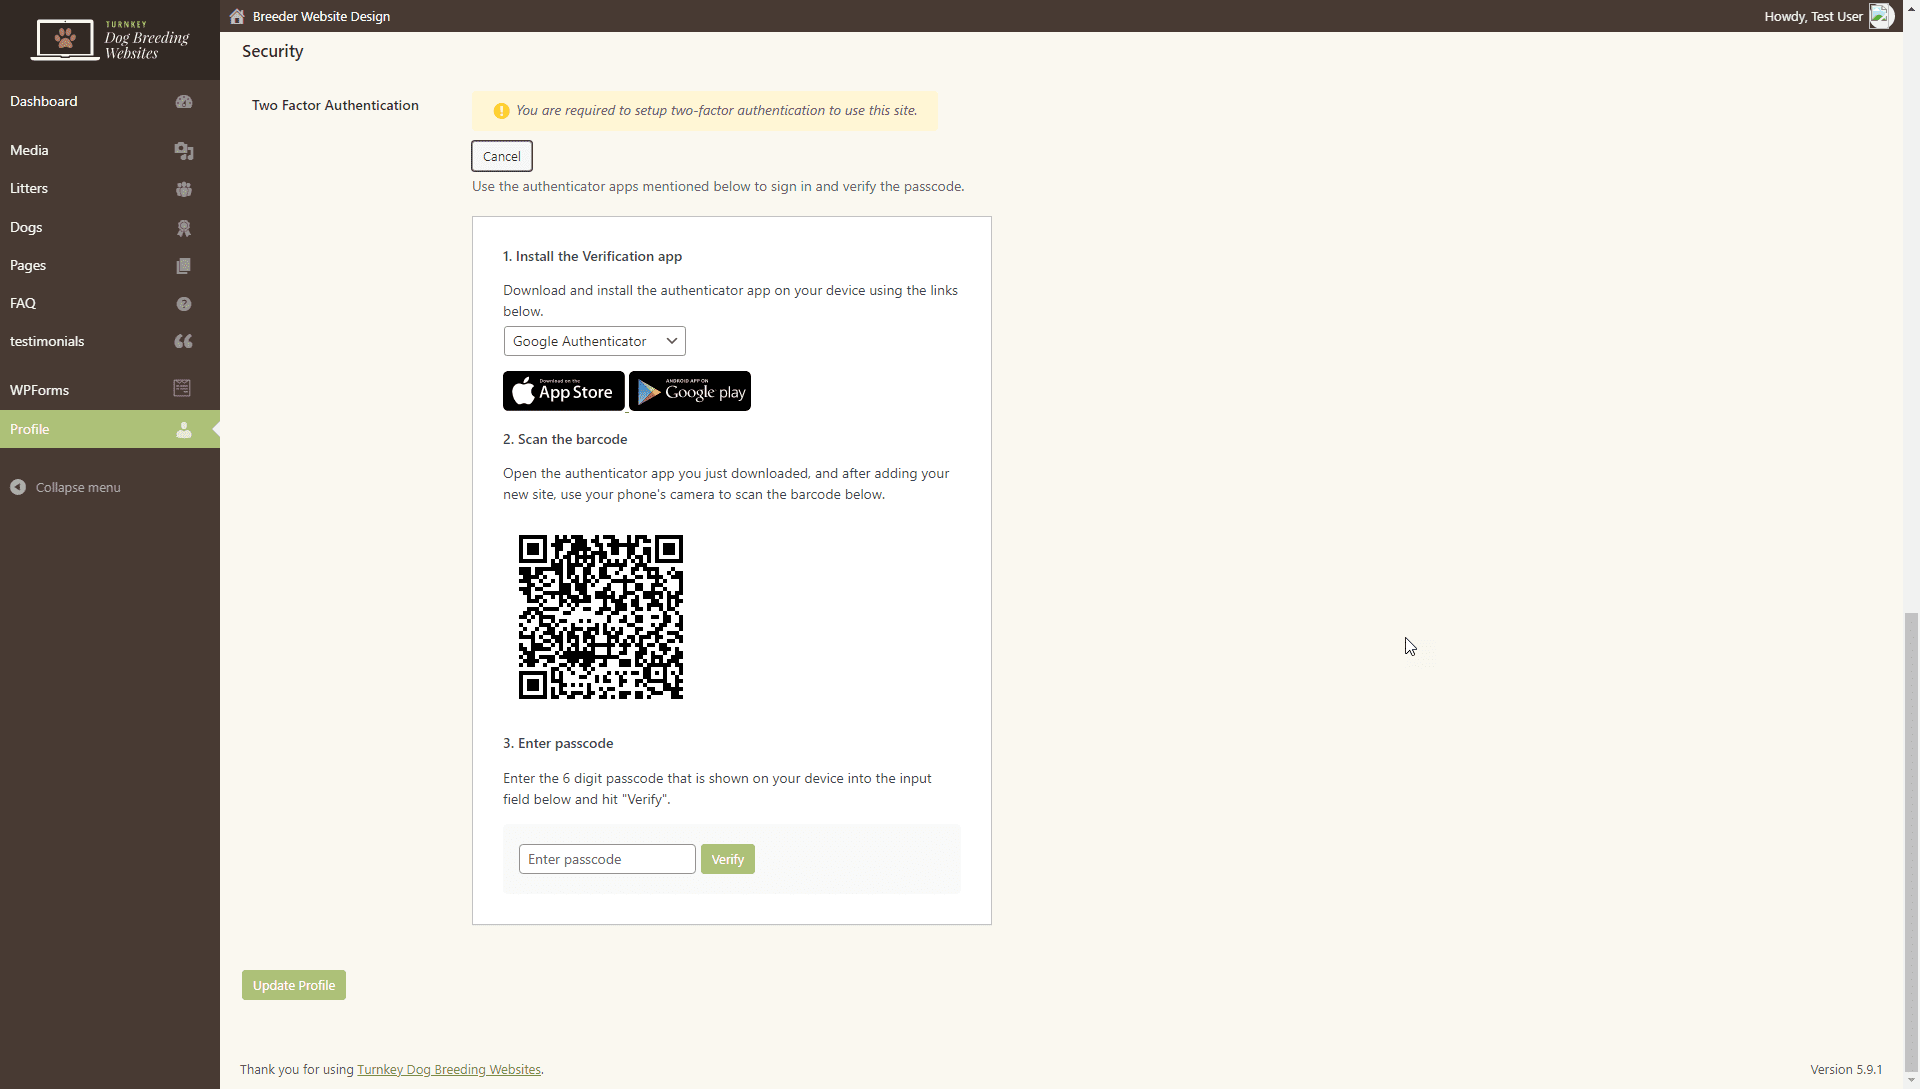
Setting Up Two Factor Authentication
- Click “Enable”
- Click the drop-down menu. Select the authentication app you want to use.
- Google Authenticator
- Microsoft Authenticator
- Authy
- Scan the barcode
- Enter passcode and click “verify”
Authy offers a modern design, optional encrypted cloud backup of your 2FA data, multi-device and multi-platform support, and three authentication types. Authy will work on Android and iOS, Windows, macOS, Linux, or even Apple Watch. Your 2FA tokens will automatically sync across all devices you authorize, and in case any of them were lost, damaged, or stolen, you can deauthorize it from any other trusted device. Check out Authy vs. Google Authenticator vs. Microsoft Authenticator Comparison Chart to learn more.


